DANDI Infrastructure
Configuring Terraform
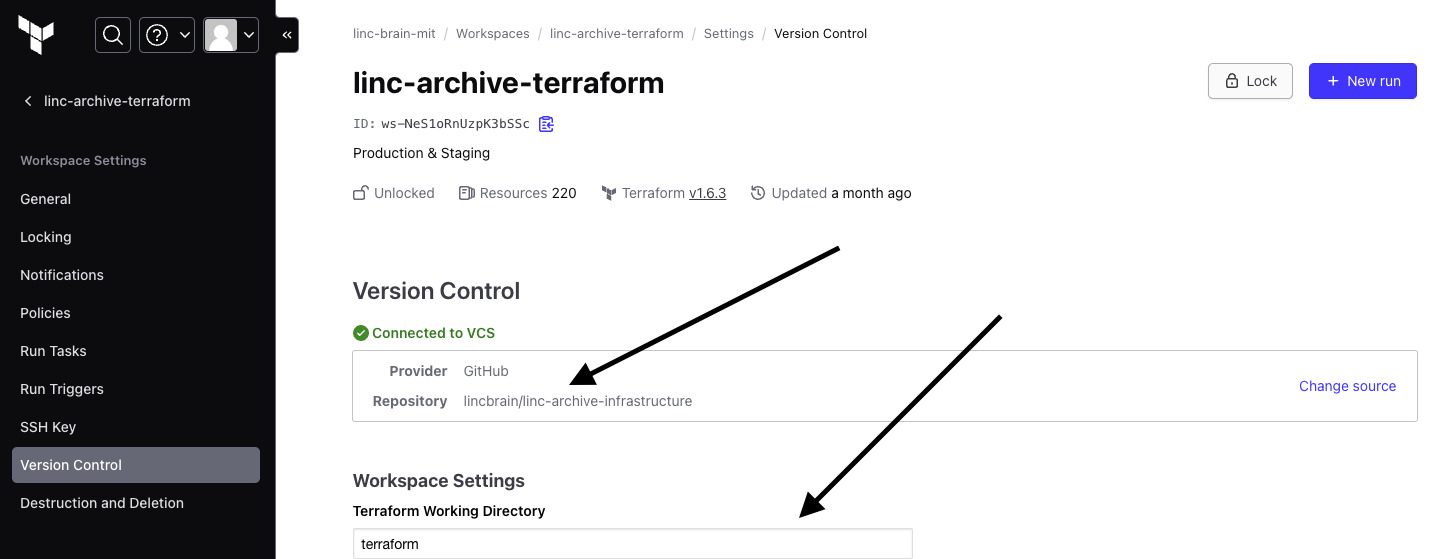
To double-check whether your GitHub repository is linked, proceed to the Version Control tab.
The Version Control Repository value should point to the repository, and the Terraform Working Directory should point to terraform
As described in the Understanding the DANDI Infrastructure section, the dandi-infrastructure
repository includes many components that may not be needed for your use case. You will need to define the infrastructure components in stepwise fashion, starting with the api.tf and sponsored_bucket.tf.
Applying Terraform
There are two ways in which you can invoke terraform plan and terraform apply upon your infrastructure.
Automatic Run Triggering
This is set to occur by default when you connect a GitHub repository to Terraform Cloud. After pushing code to your repository,
Terraform will run terraform plan, generating a summary of what will happen if you were to run terraform apply.
**Note: terraform apply will not be run automatically (this is good!), so be sure to review and check prior to applying.
To view, go to the Runs tab -- you will see that the Terraform run populates the GitHub code action above

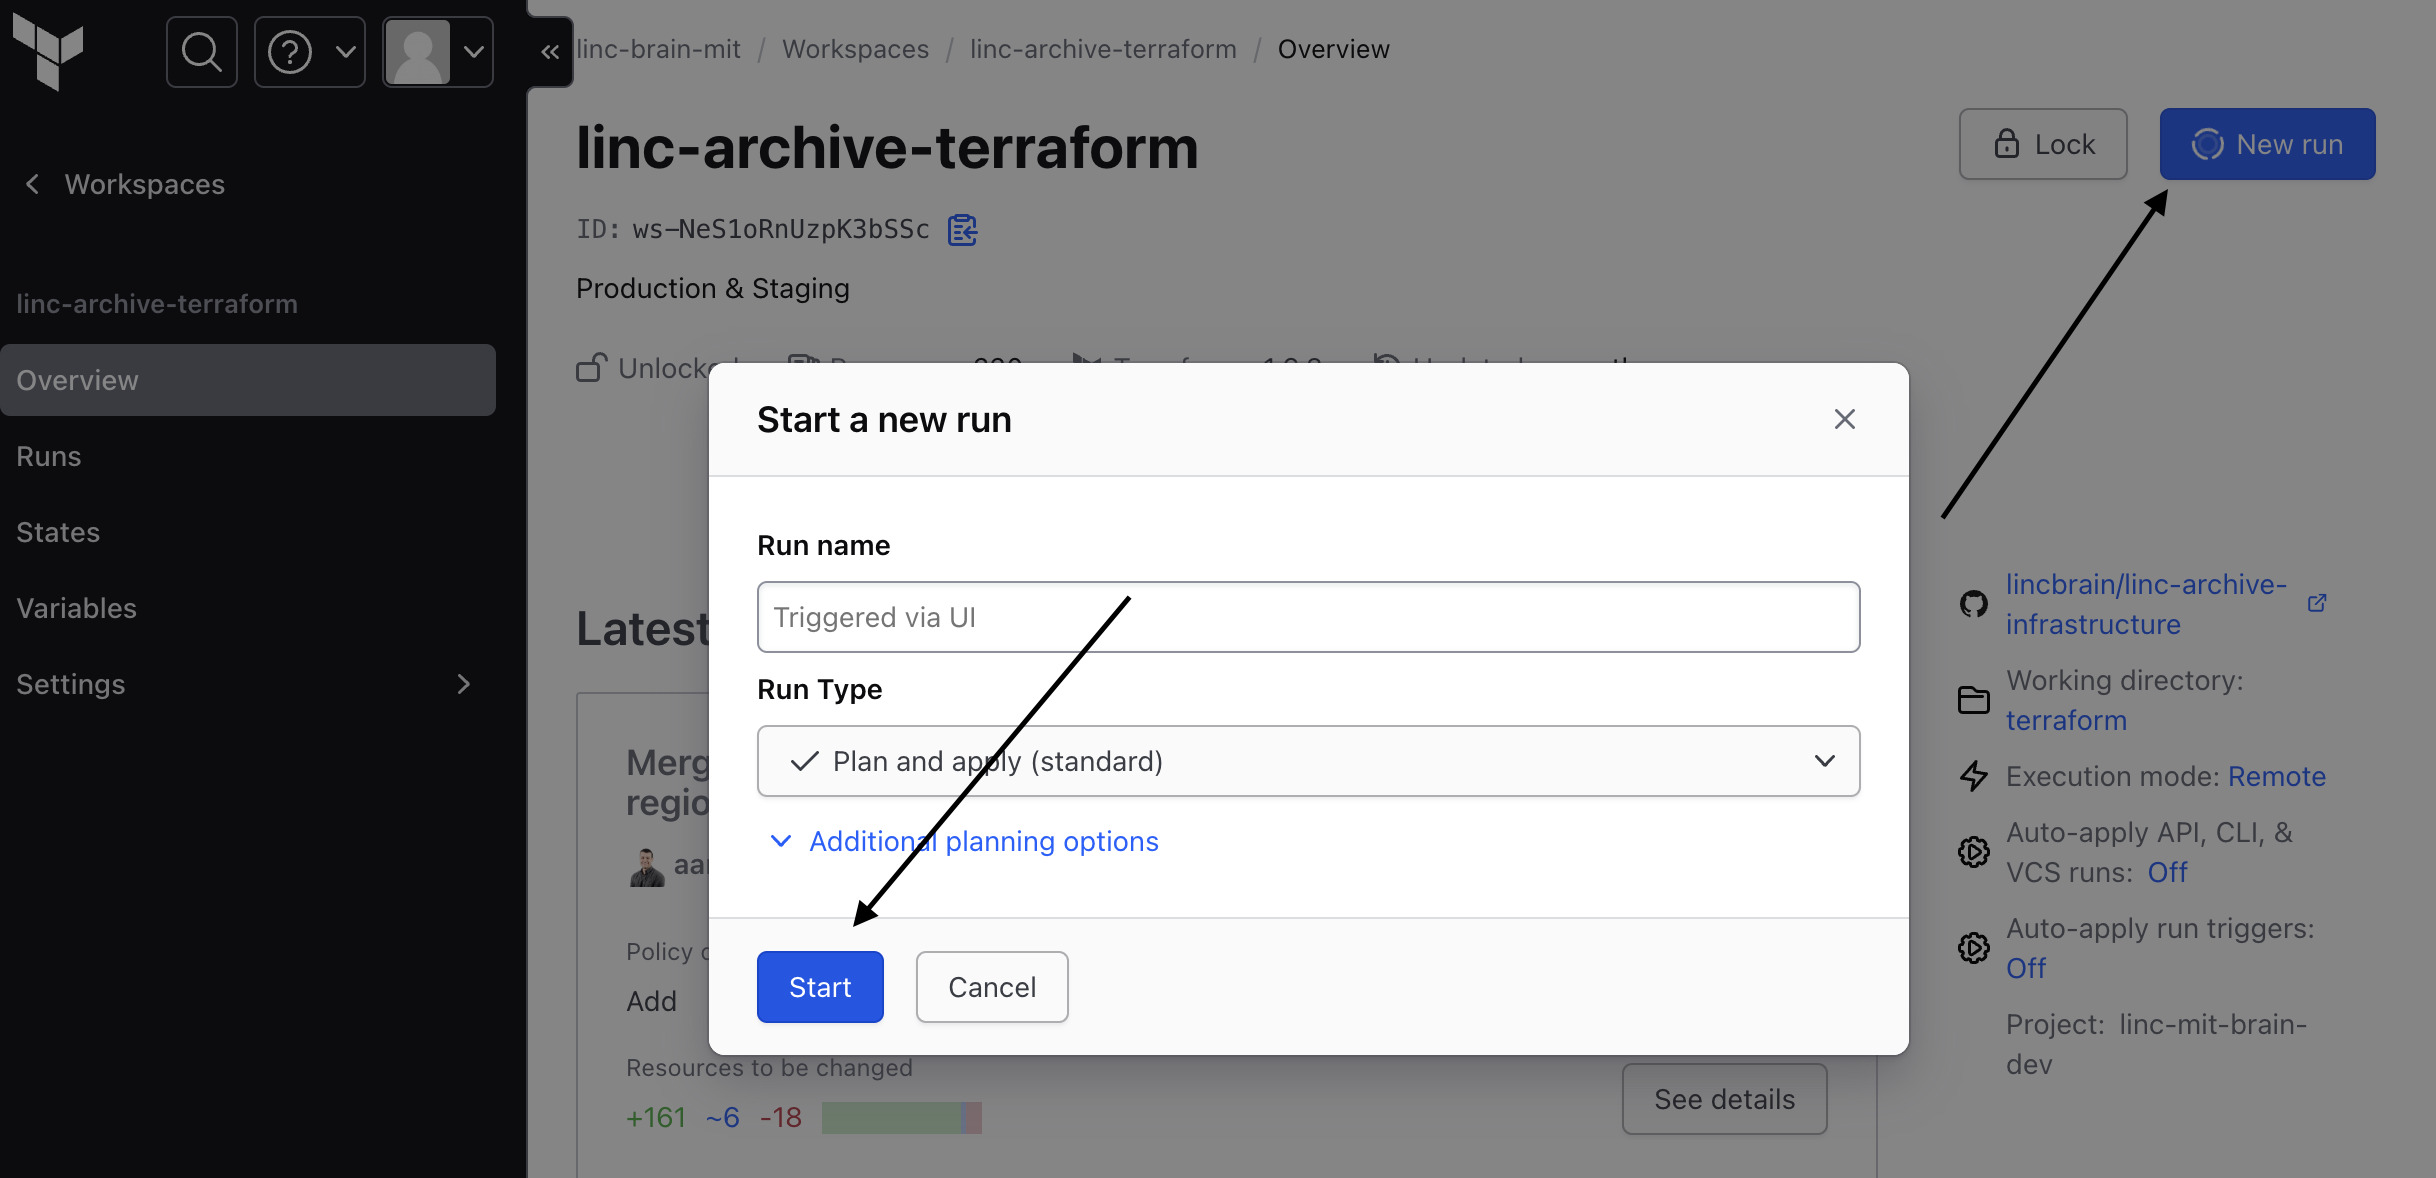
Trigger Run from UI manually
If you'd like more control over Terraform, you can also default to run manually.
Understanding the DANDI Infrastructure
Resonant
In the api.tf definition, there is reference
to a source keyword, where a Terraform module called Resonant is defined.
In the Resonant submodule, AWS and Heroku resources are defined that facilitate base resources for compute and networking to work with DANDI Archive. Within the DANDI Infrastructure downstream, Resonant is used by declaring values that the Terraform module expects. Resources declared by Resonant cannot be overwritten
Sponsored Bucket
This is DANDI Archive specific in which the code in main.tf and the presence of downstream-related files should be commented out for any clones.
A sponsored bucket is also declared in the main.tf, with downstream, related files called sponsored_iam.tf and sponsored_bucket.tf.
Domain Management
DANDI Infrastructure assumes that you 1. own a domain, and 2. have purchased that domain (or have that domain managed) via AWS Route 53
DANDI Infrastructure connects domains from three different vendors:
- Netlify: Manages load balancer IPs and custom domains for the UI.
- AWS Route 53: Manages CNAME records for SSL certificates and links Heroku API URLs to domains.
- Heroku: Provides domains for API services, which are aliased via AWS Route 53.
Netlify
Although Netlify prescribes mapping of Netlify-issued DNS records directly, DANDI Infrastructure relies on mapping Netlify's Load Balancer IP to the respective A Name Record in AWS Route 53, as prescribed in Netlify's docs
resource "aws_route53_record" "gui" {
  zone_id = aws_route53_zone.dandi.zone_id
  name    = "" # apex
  type    = "A"
  ttl     = "300"
  records = ["75.2.60.5"] # Netlify's load balancer, which will proxy to our app
}
Note the code snippet above is from the DANDI Infrastructure domain.tf.
AWS Route 53 and ACM
A manual step is necessary to set up an SSL Certificate for your DNS records throughout your DANDI clone.
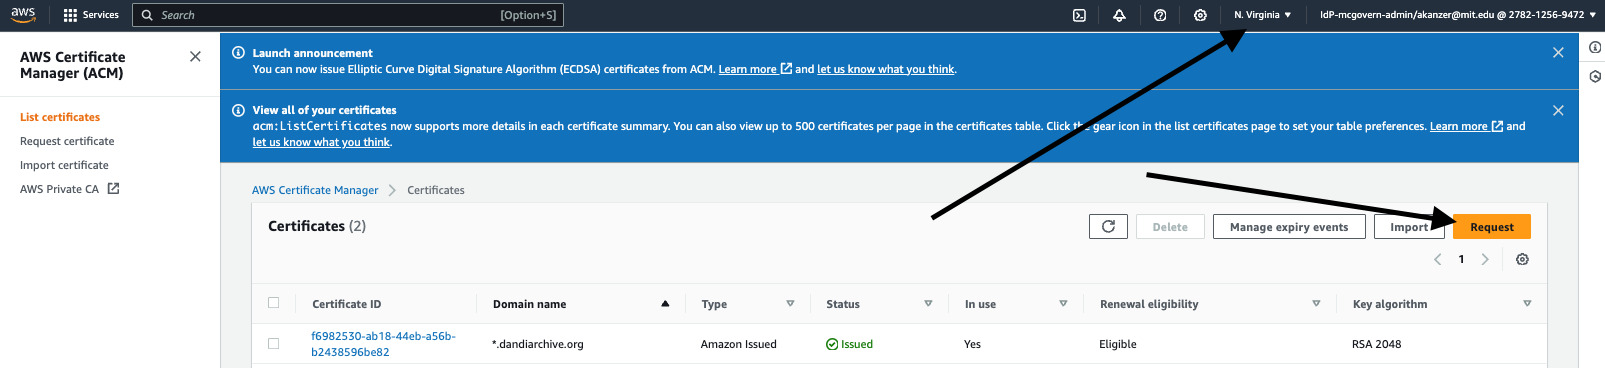
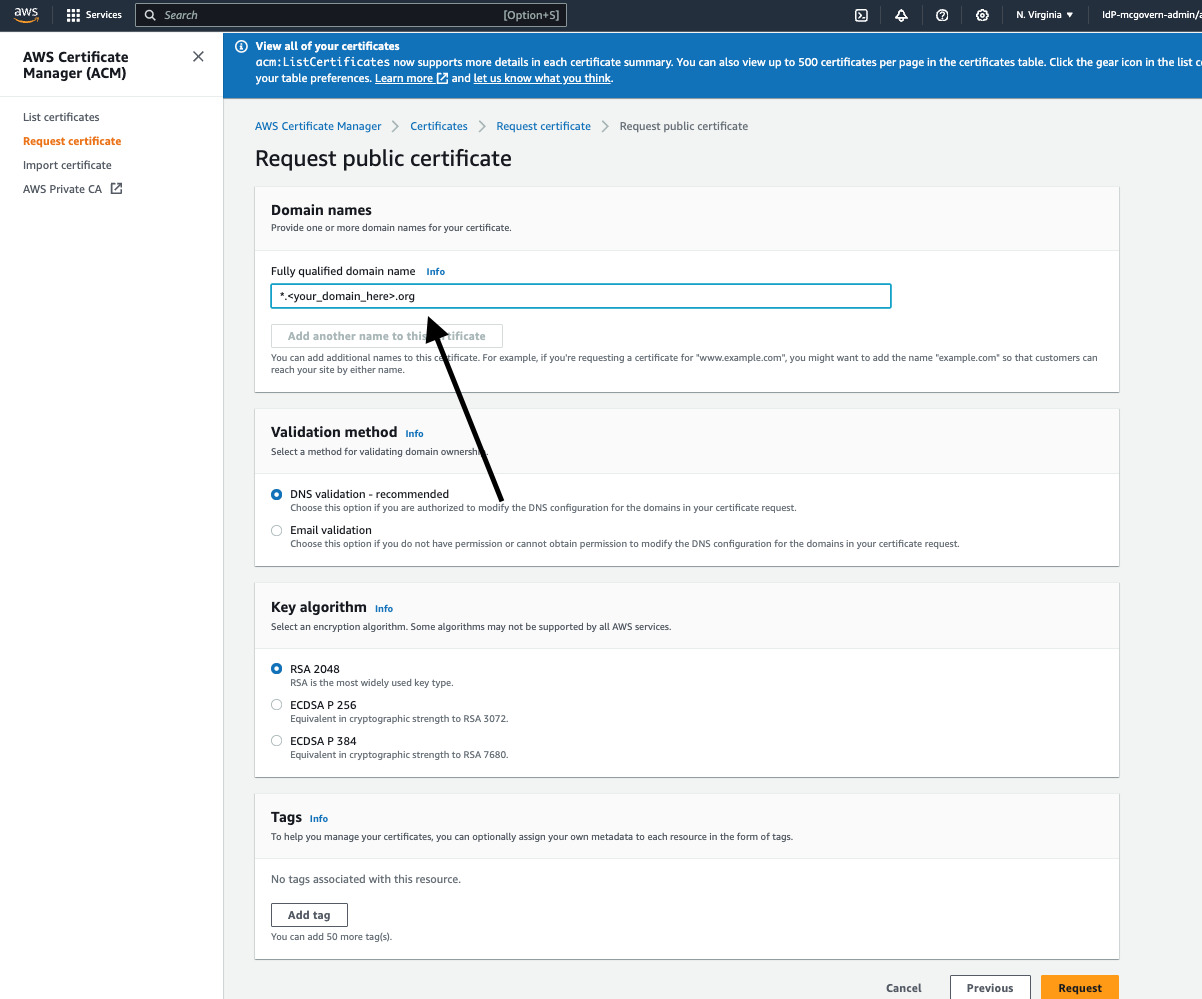
Proceed to AWS Certificate Manager. Begin by requesting a certificate -- **Note: Ensure you are in the same region as the default you have provided in your Terraform main.tf template.
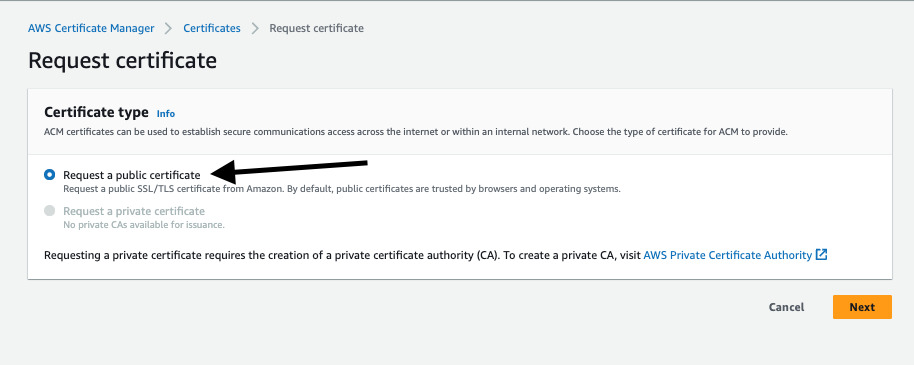
Next, request a Public Certificate
When setting up the certificate, provide a value of *.<your_domain_name> -- the goal being that the * will serve as a wildcard for both your API and UI DNS records.
Lastly, validate your certificate via DNS Records. This can be done by using the CNAME values expressed by the certificate and linking them as records in your DNS Hosted Zone.
Heroku Dyno Sizes
dandi-infrastructure defines "dyno" (a.k.a process) sizes for each service being run. For specific reference,
see here in api.tf.
While your DANDI Archive clone may differ in traffic and activity, the defaults set in dandi-infrastructure rarely
exceed 75% usage.
Keep in mind the different pricing structures that come with choosing different Heroku dyno sizes
Heroku Add-Ons
In addition to the Heroku 'dynos' that are added for compute, multiple Heroku 'add-ons' are included
- CloudAMQP -- Use Case: Message Broker
- Postgres -- Use Case: Database
- Papertrail -- Use Case: Log Management
Heroku API Domain
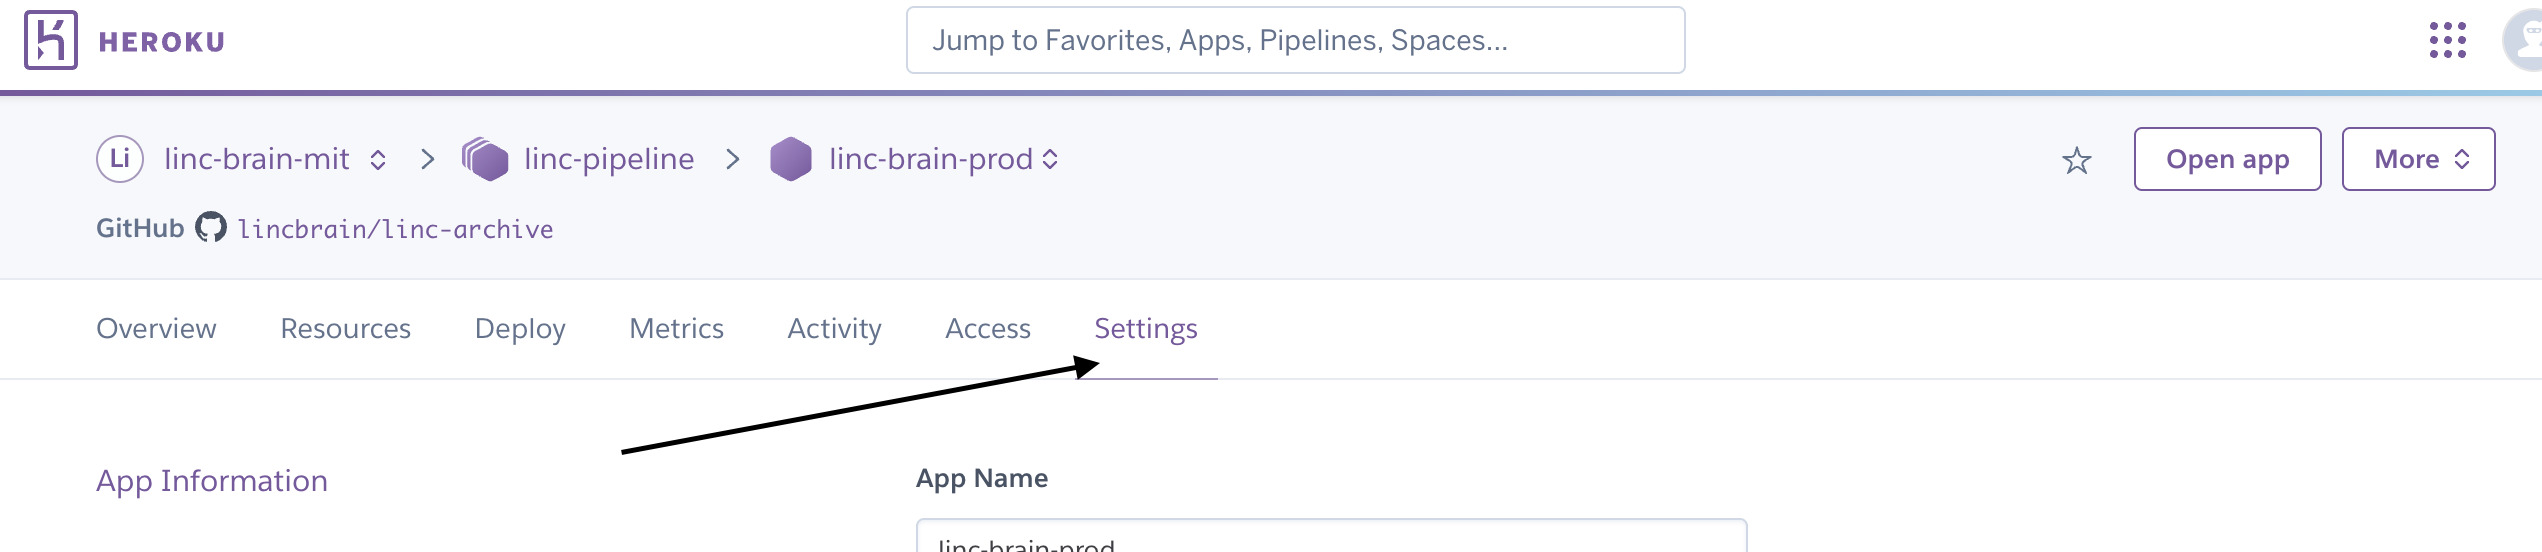
Heroku will provision an API endpoint for your DANDI Archive. In order to properly map and configure that domain, first proceed to the
Settings tab in Heroku.
Scroll down and find configuration options for SSL and Domains. Heroku will give you a random DNS target for
the API (in the case of the screenshot below sleepy-jellyfish-0e1p913yo2bgizl1808pss2p.herokudns.com)
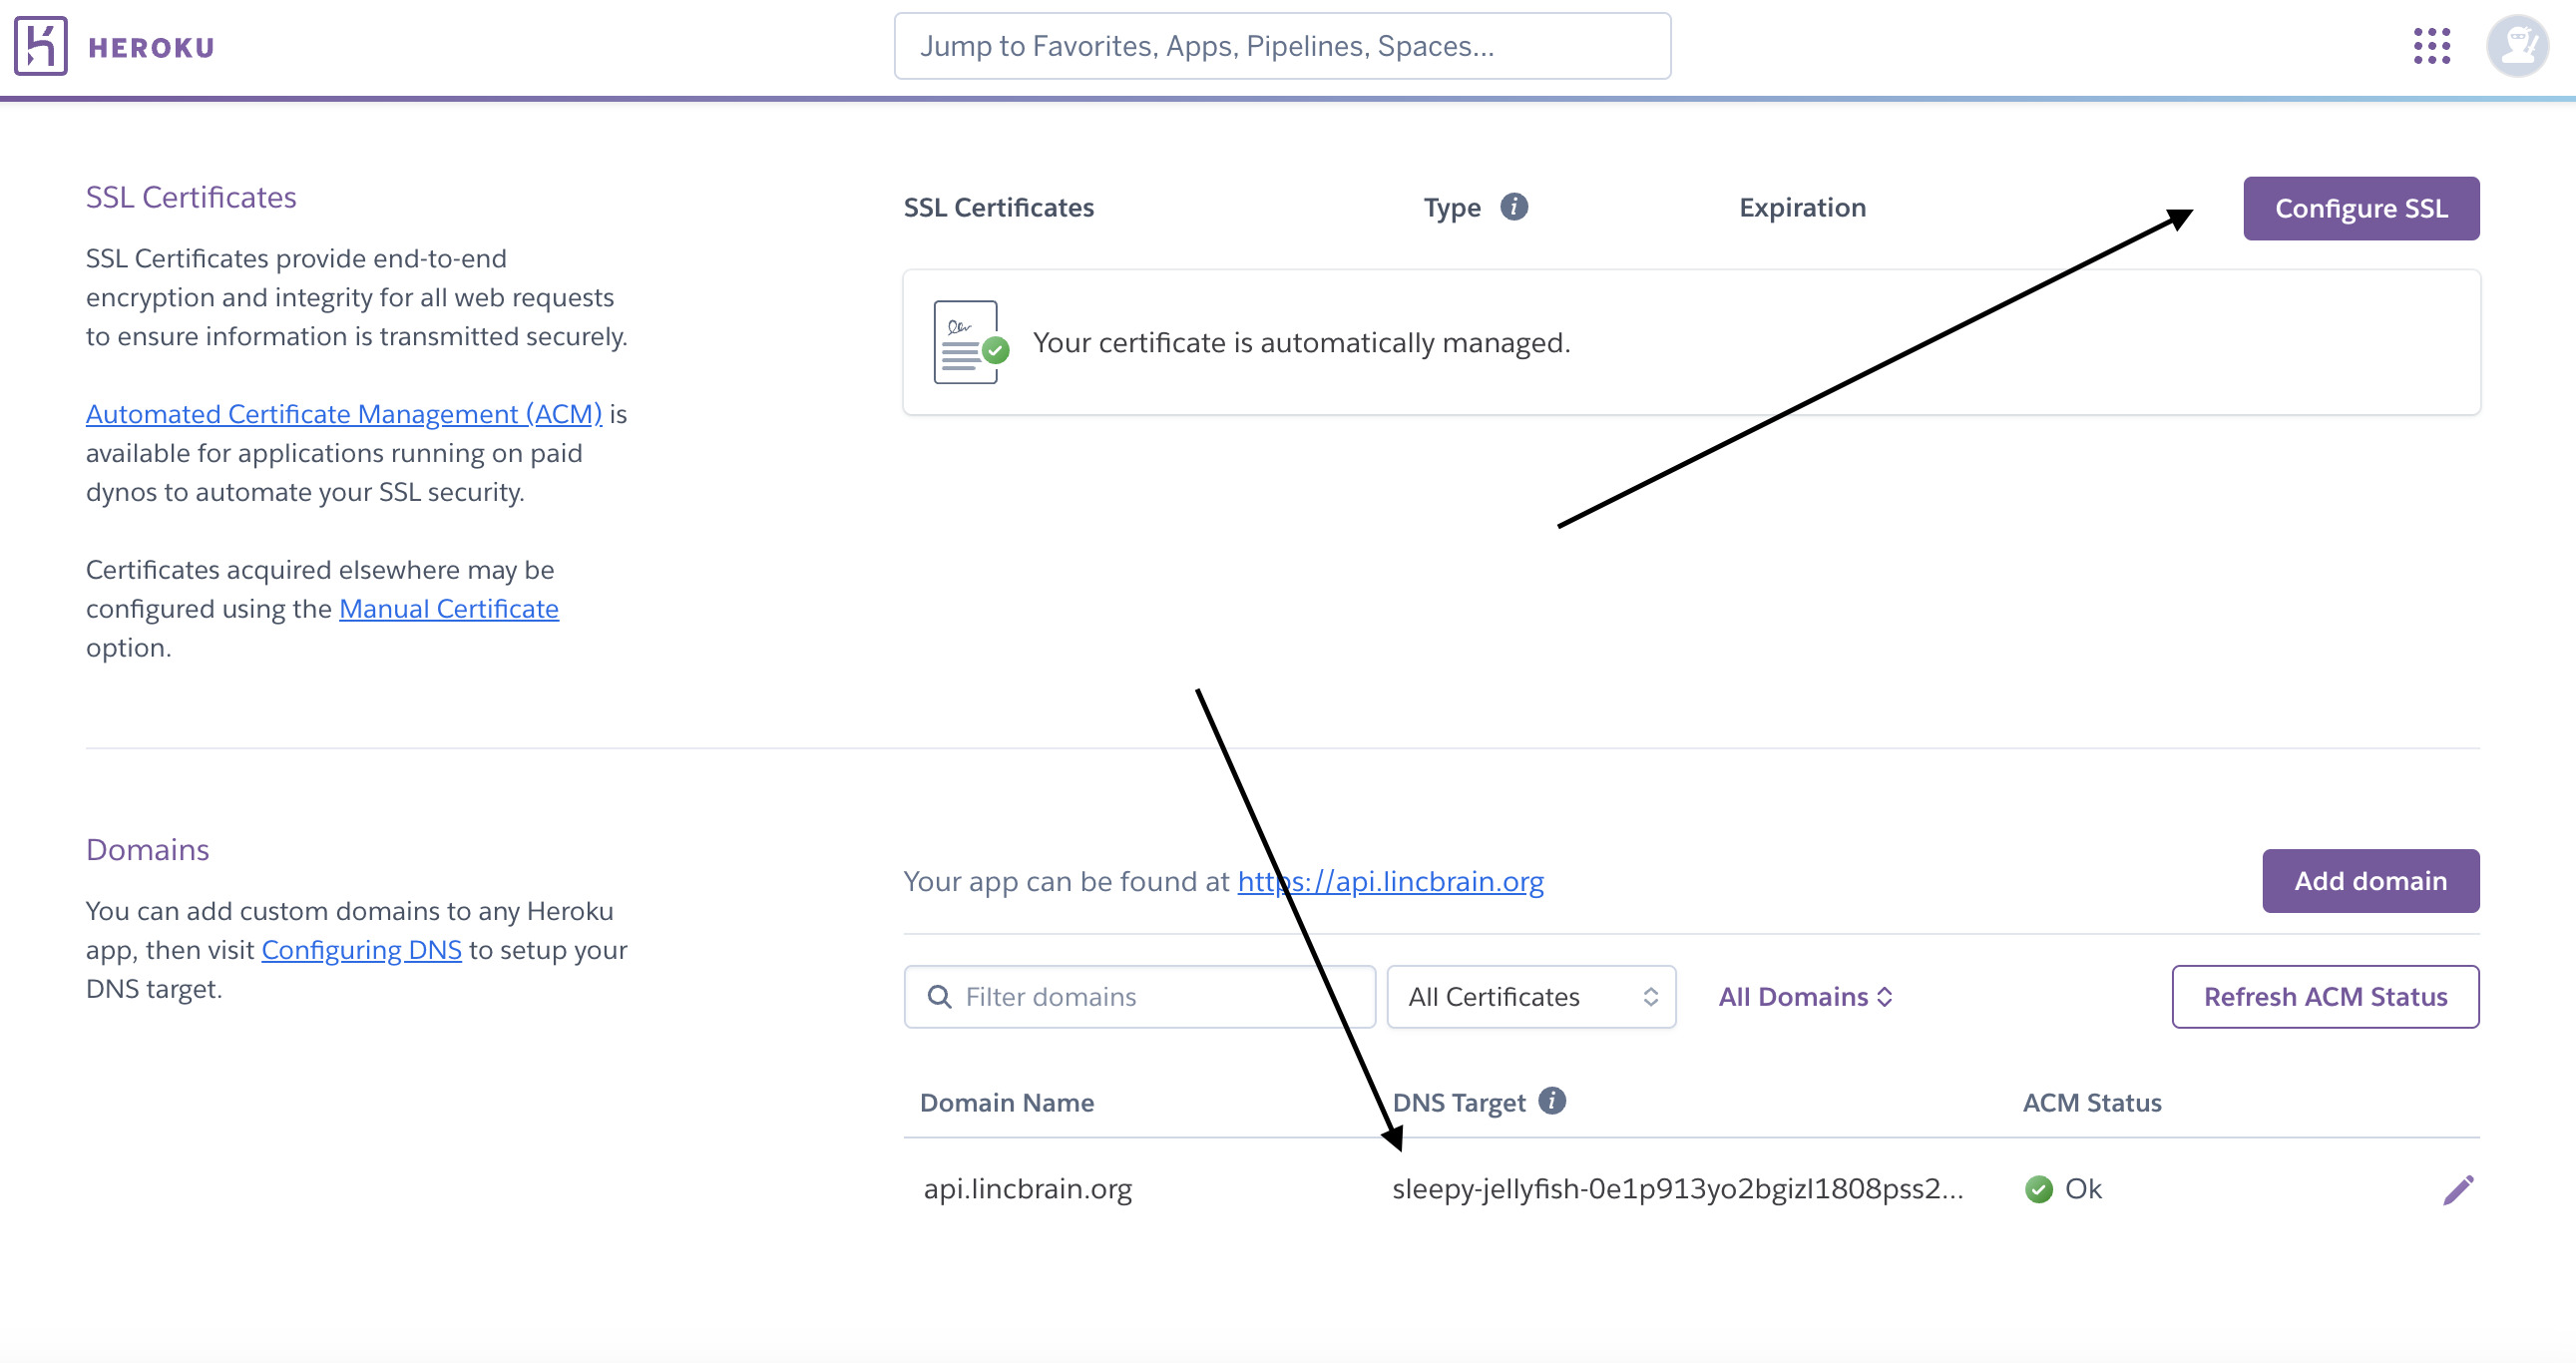
Proceed to AWS Route 53. Create a corresponding CNAME that maps to the DNS target provided by Heroku.
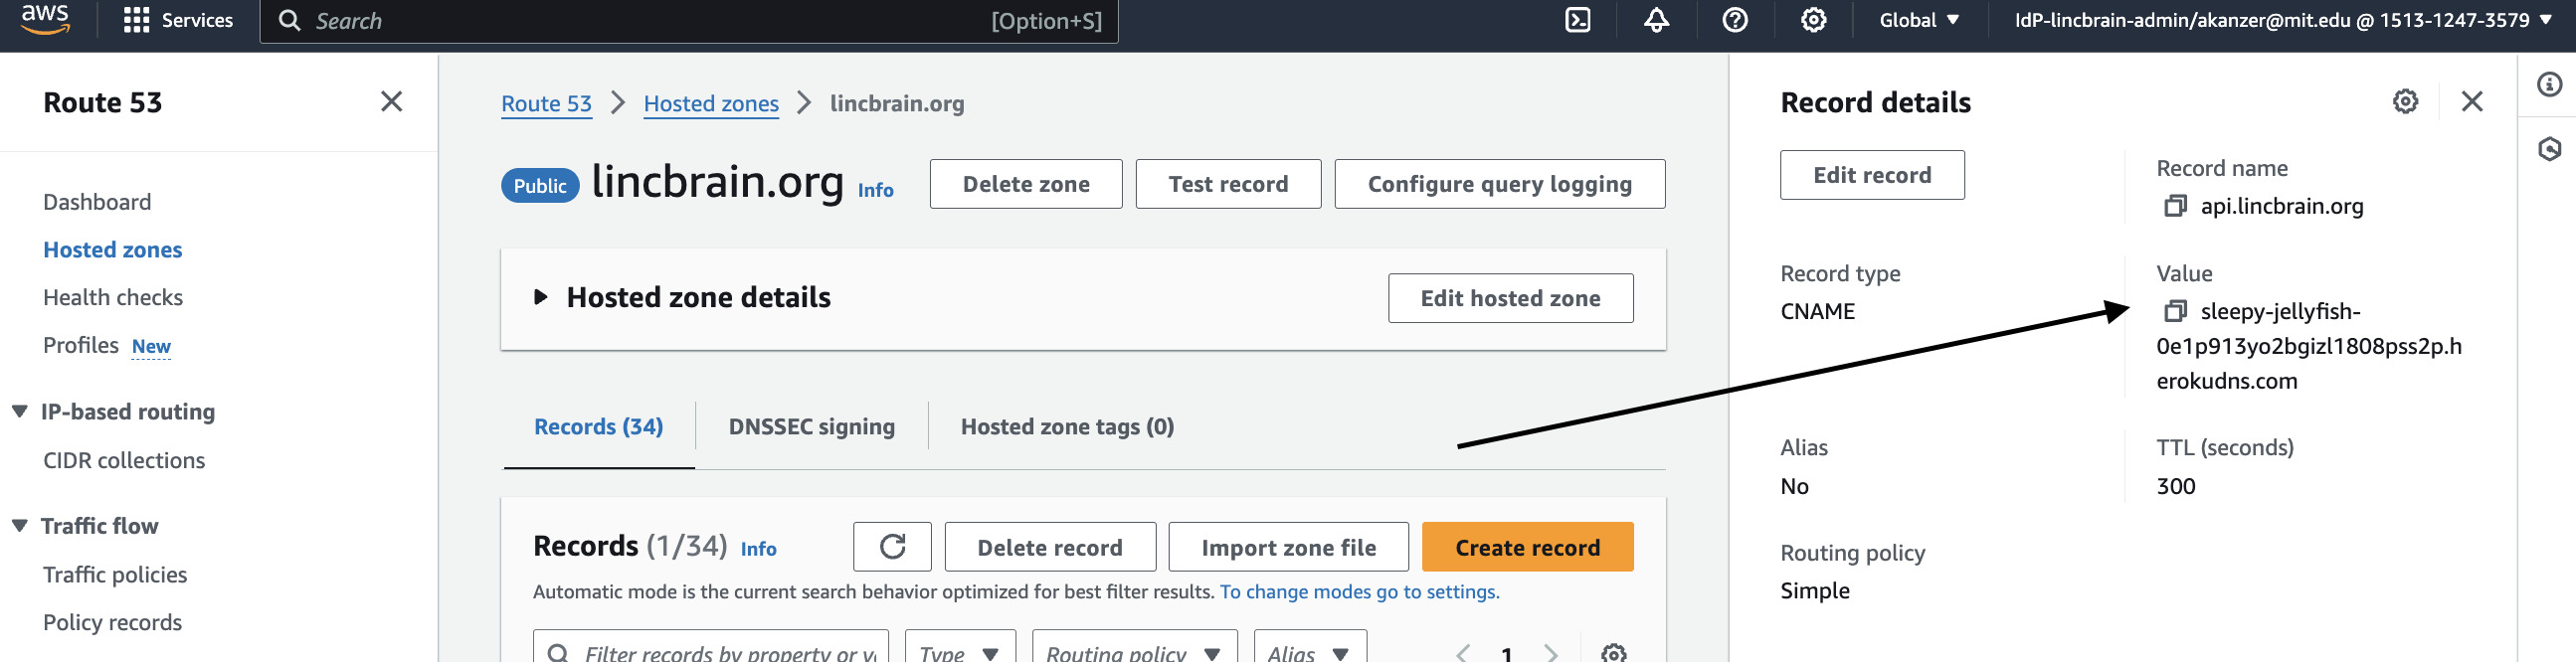
As long as the CNAME is covered by a valid SSL certificate, should be fully set up now.
AWS Buckets
While Resonant does declare S3-based resources, configuration is still needed within DANDI Infrastructure.
Find your AWS Account ID. This value will be referenced in the main.tf Terraform template.
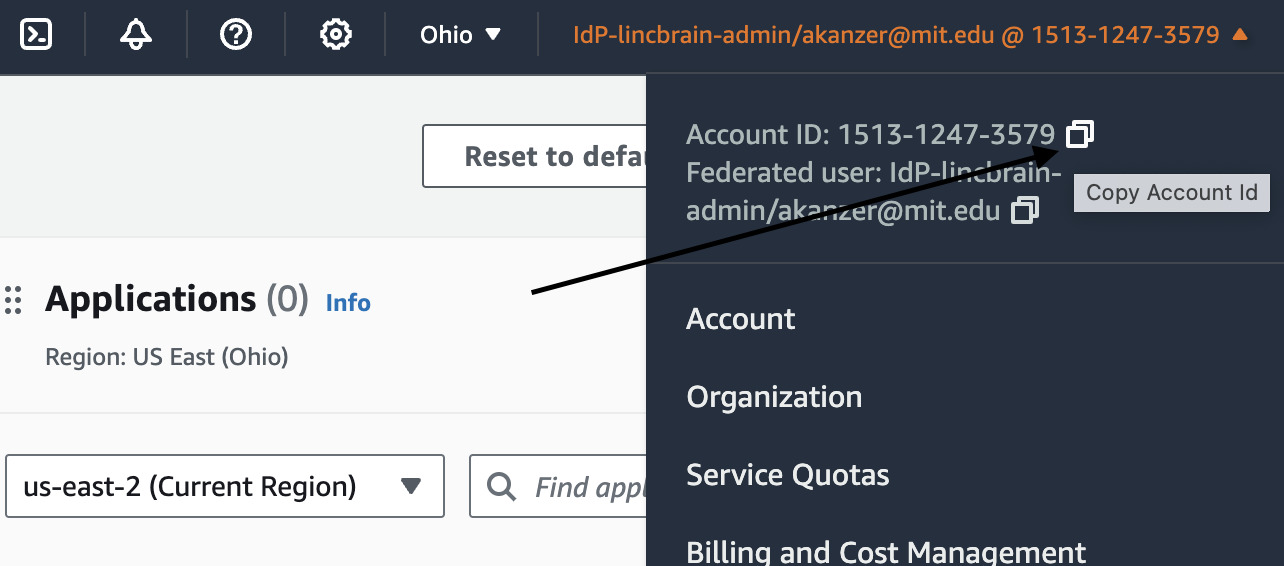
Populate the value in the appropriate account ID reference in the main.tf template.
Staging vs. Production
For staging, you can modify and apply the staging_bucket.tf and staging_pipeline.tf.
Setting up staging will require unique AWS Route 53 Domains, as well a different Heroku app with different compute.
Note -- ensure you review your web/netlify.toml file in DANDI Archive -- this will define different environment variables that correspond with staging vs. production
Email Setup
We will add docs in the future (https://github.com/dandi/dandi-docs/issues/177).