Initialize Vendor Accounts
The DANDI ecosystem relies on vendor services to operate. So first you will need to set up accounts with the following vendors:
-
Heroku: Provisions the API components.
-
AWS: Provides storage buckets (S3), as well as domain management (Route53), for resources across the DANDI ecosystem. As well as the services (EC2, Kubernetes, etc.) for deploying the JupyterHub.
-
GitHub: Serves as the authentication provider for accounts across the DANDI ecosystem.
-
Terraform Cloud: Manages provisioned resources across cloud vendors in a version-controlled manner.
-
Netlify: Deploys production frontend build, as well as staging previews to assist with frontend development.
-
Sentry: Provides observability and monitoring for API events.
Some services are not yet integrated within the main infrastructure:
• https://github.com/dandi/backups2datalad - to populate/update https://github.com/dandi/dandisets, https://github.com/dandisets, and https://github.com/dandizarrs/
Heroku
Create your own Heroku account
No special steps here, just create!
Create a "Team"
Send invites to the appropriate e-mail addresses to onboard your team
Create an "App"
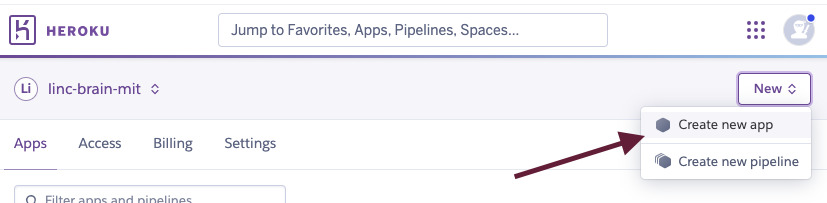
You can name whatever you wish -- no need to add a pipeline, etc. Be sure to note the app name
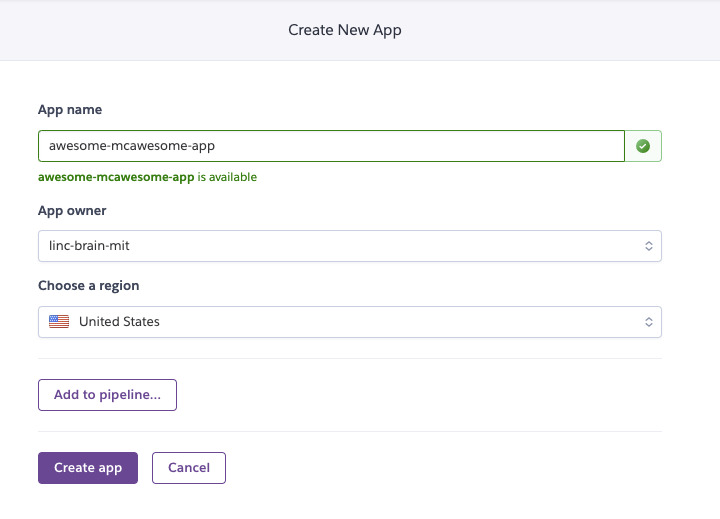
Your app will be an empty template, but that is OK -- more to come here!
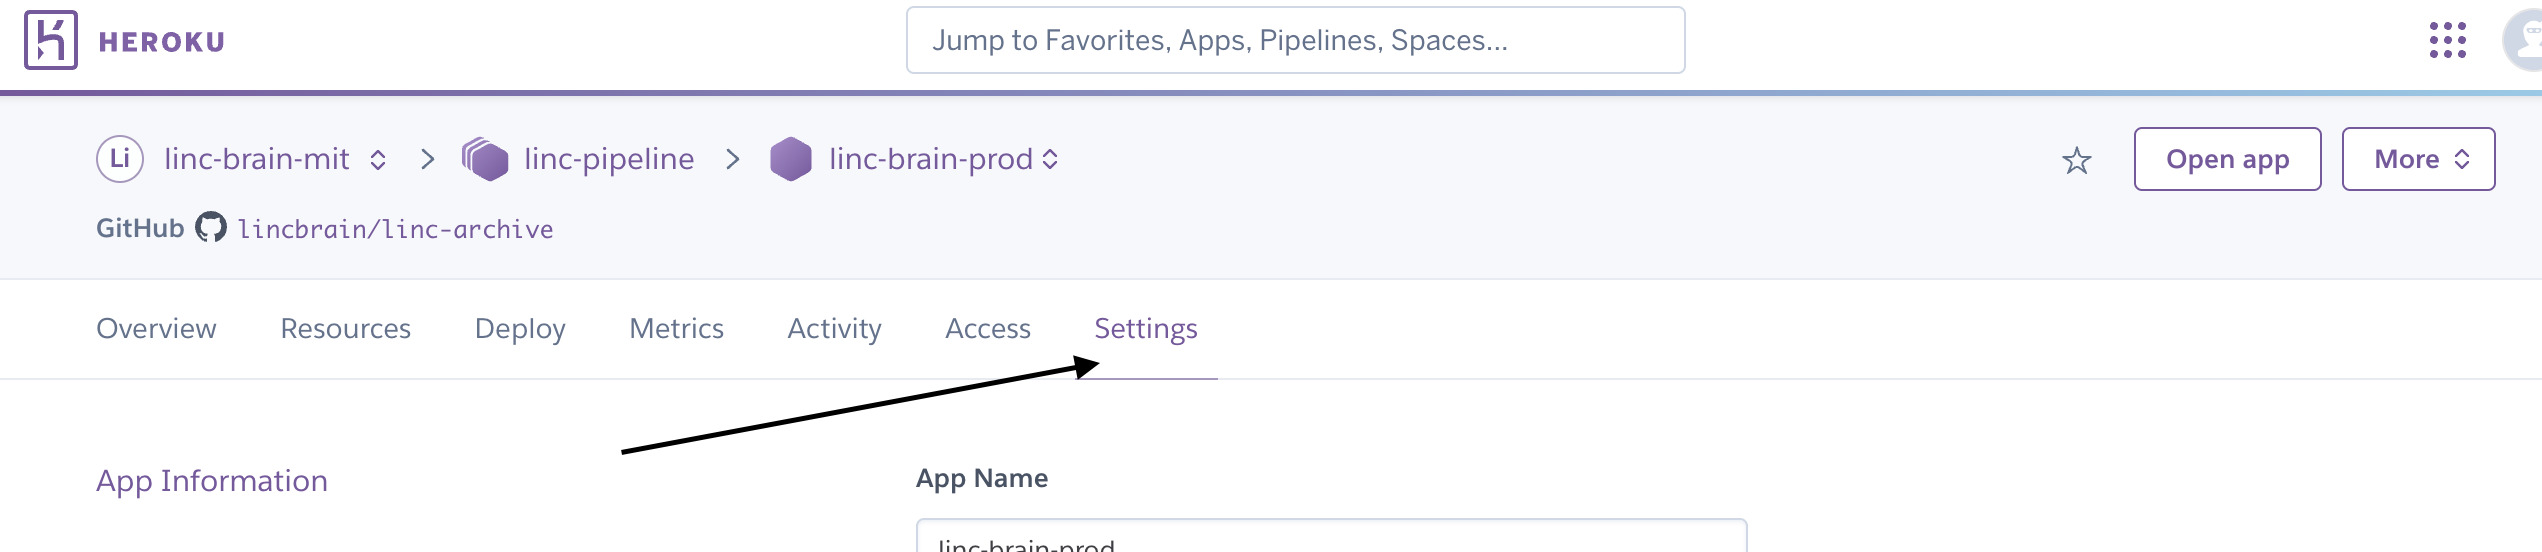
Obtain Heroku API Key
You'll need to provide access to Heroku for GitHub, Terraform, etc. -- thus, you'll need to generate an API Key
First go to your Account Settings:
Next, find the API Key section and generate a new key.
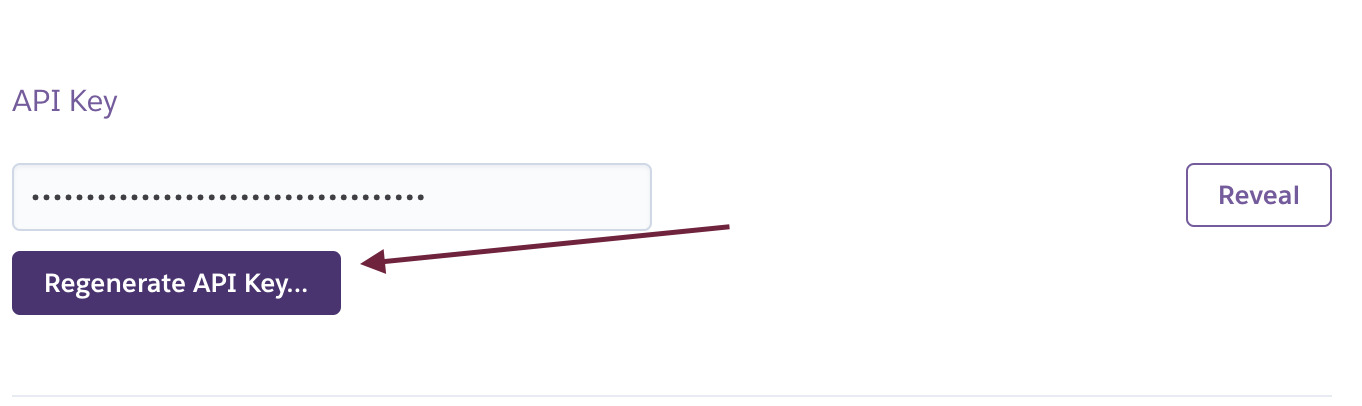
Keep this value for further steps.
AWS
Create your organization's AWS account
No special steps here, just create!
Create an IAM User Group with AdministratorAccess
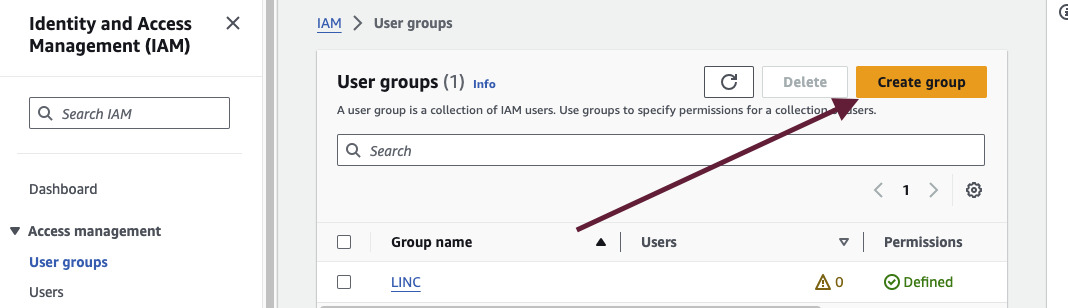
Ensure that you click the right policy in the Attach permissions policies section.
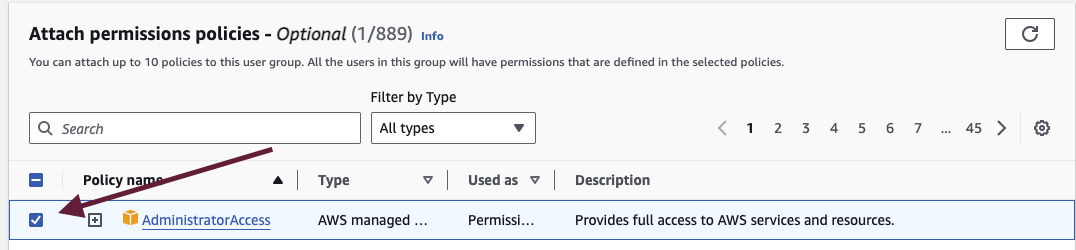
Note: If you know more refined permissions to give the IAM Group, that is preferred, as those with access
to the credentials of AdministratorAccess in AWS can be an extreme security hazard if not managed appropriately

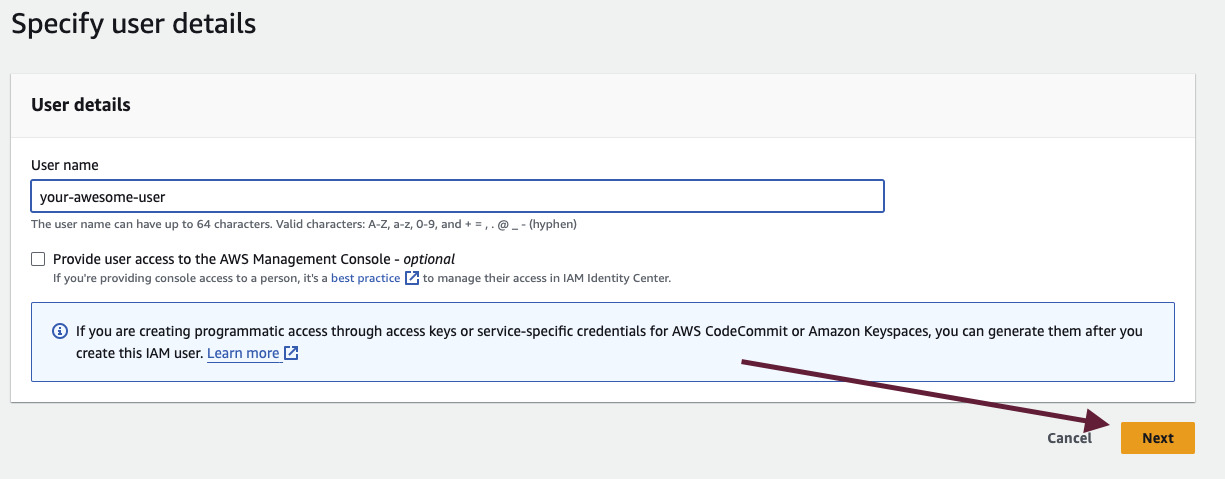
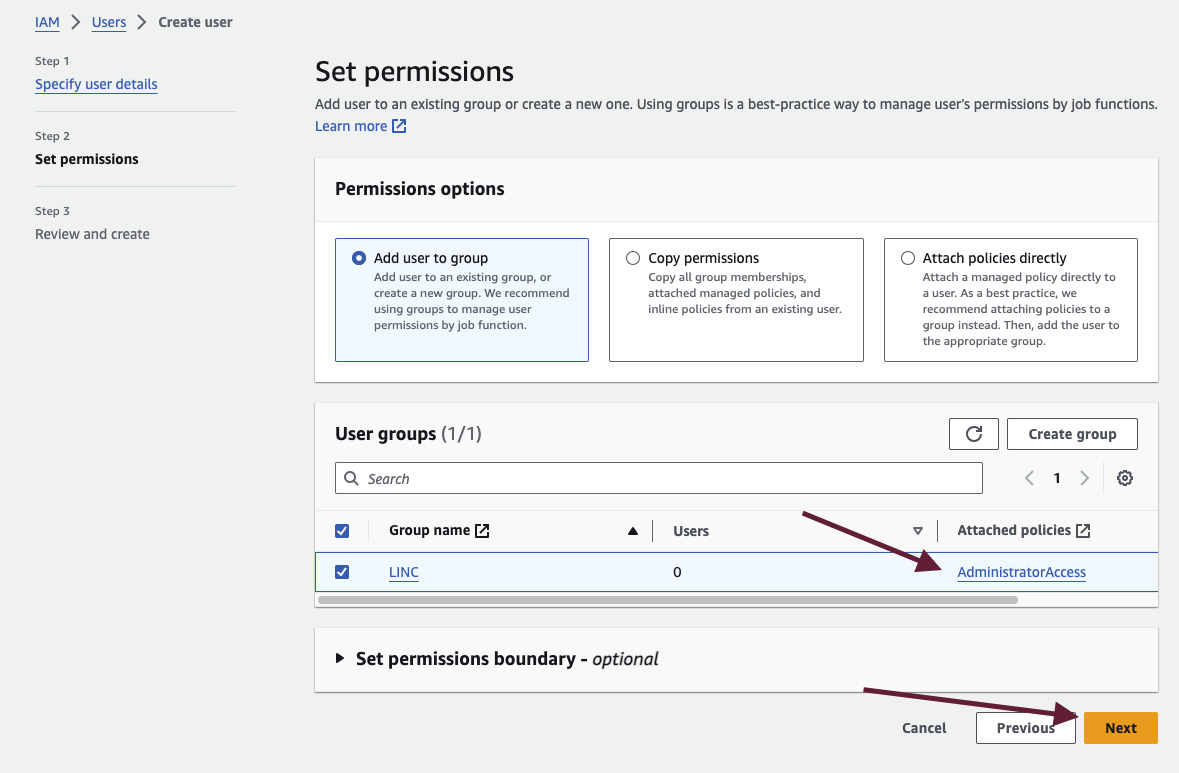
Create an IAM user that lives in the User Group you made

Next, give a unique name -- no need to enable Console Access
Lastly, add them to the Group you made in the step above:
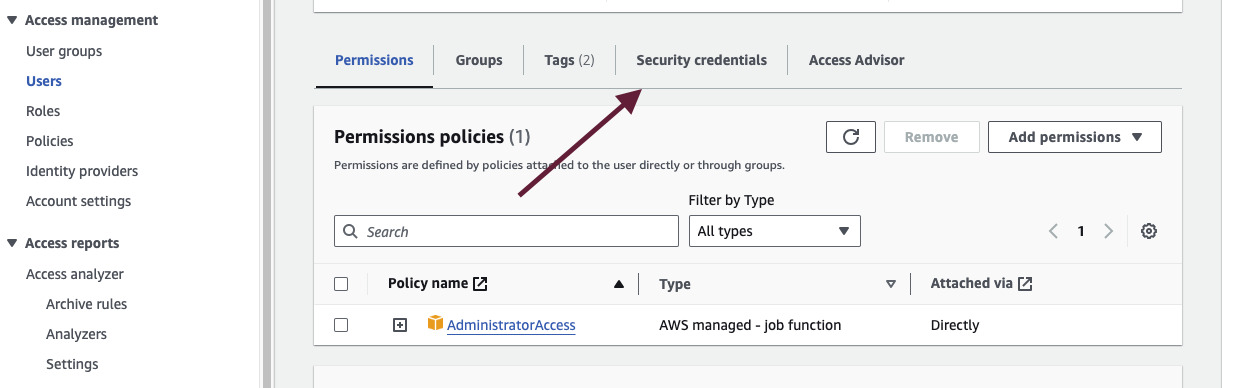
Create security credentials
You'll need to create Security Credentials for your User -- these credentials will be specifically used
in your Terraform Cloud setup
Firstly, go to your User and click the Security Credentials tab:
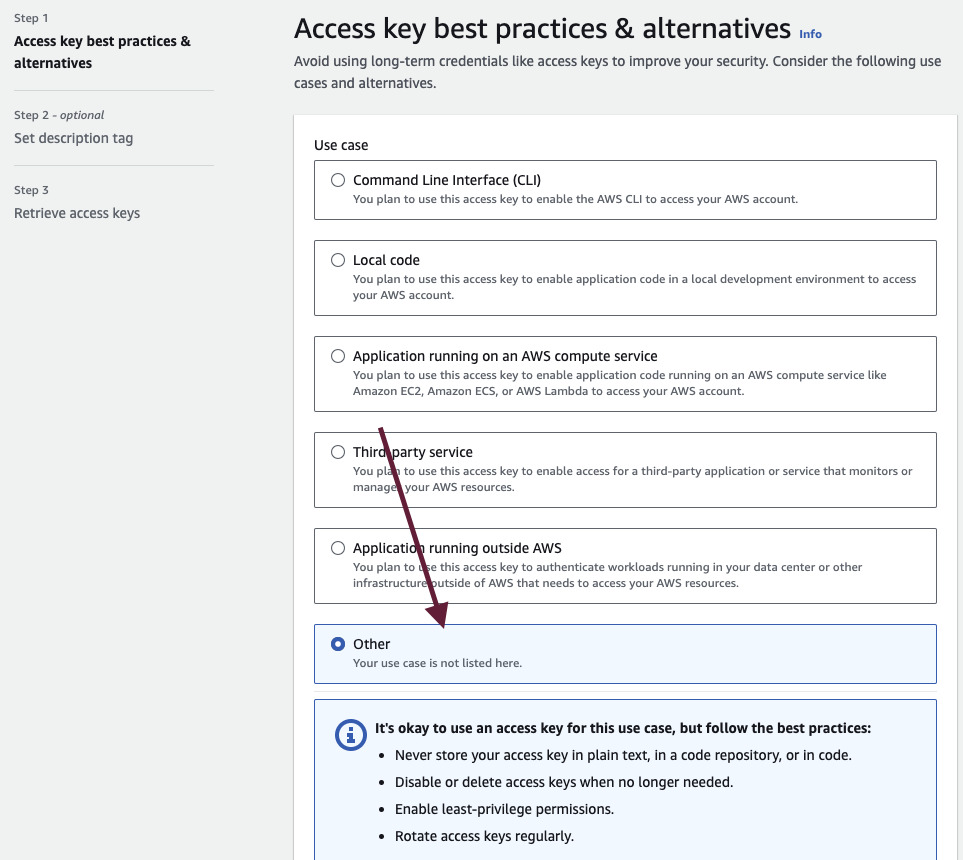
Navigate to Create access key

You'll be prompted to provide a reason for the access key creation. It doesn't matter much, so Other is a completely acceptable choice
Time to create the key!
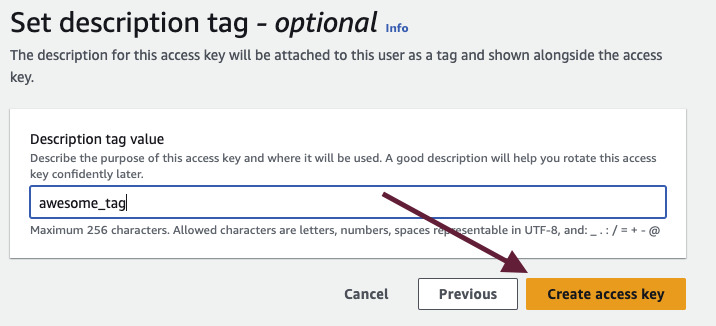
You'll be provided with the values of your Access key and Secret access key -- store these values somewhere secure and accessible

GitHub
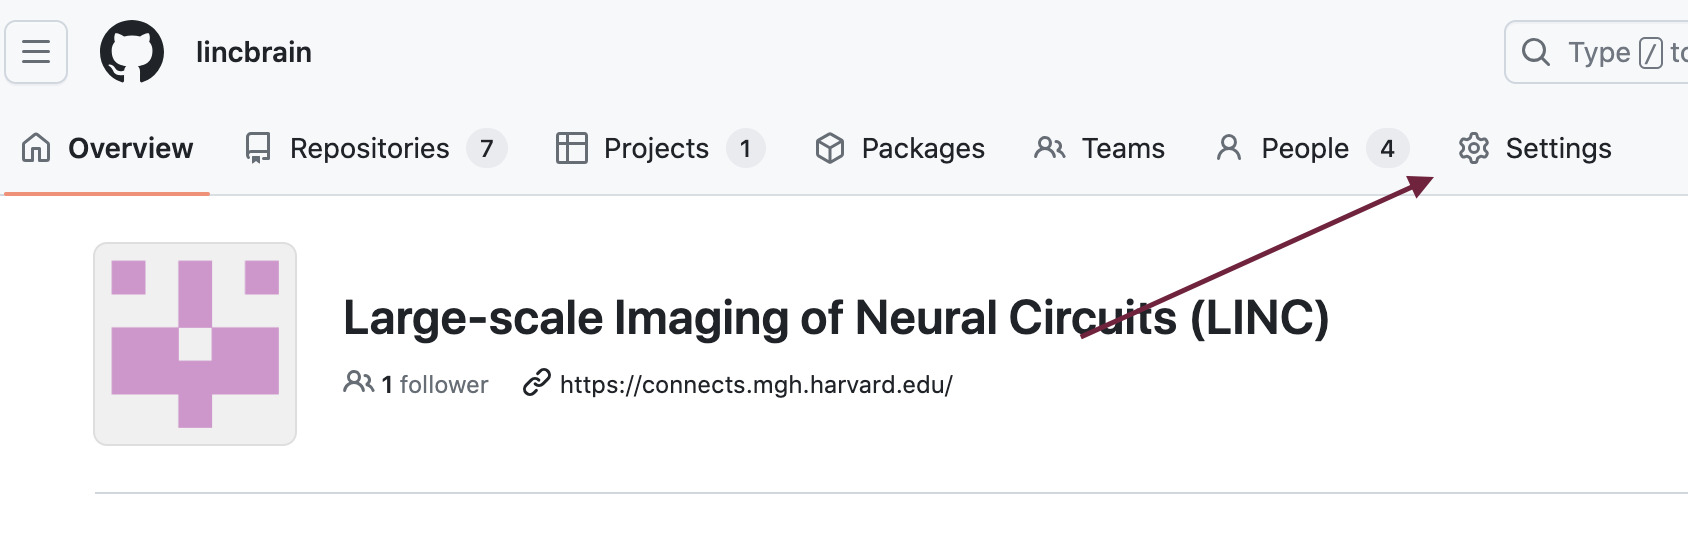
You'll need to create a GitHub Organization where you can fork the DANDI repositories. See here for documentation to create a GitHub organization
Initialize your OAuth App
Once you create the Organization, navigate to the Settings tab:
Under Settings, you'll want to initialize an OAuth App -- navigate to Developer settings > OAuth Apps
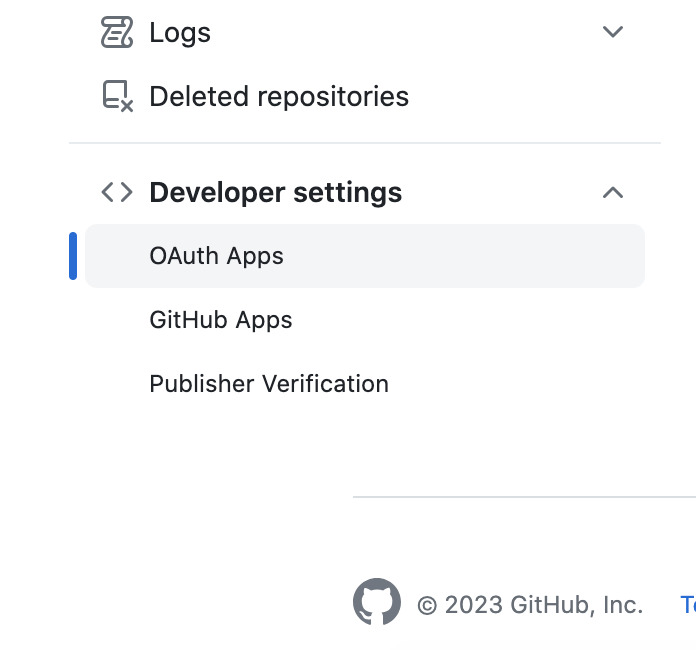
Click on New Org OAuth App next

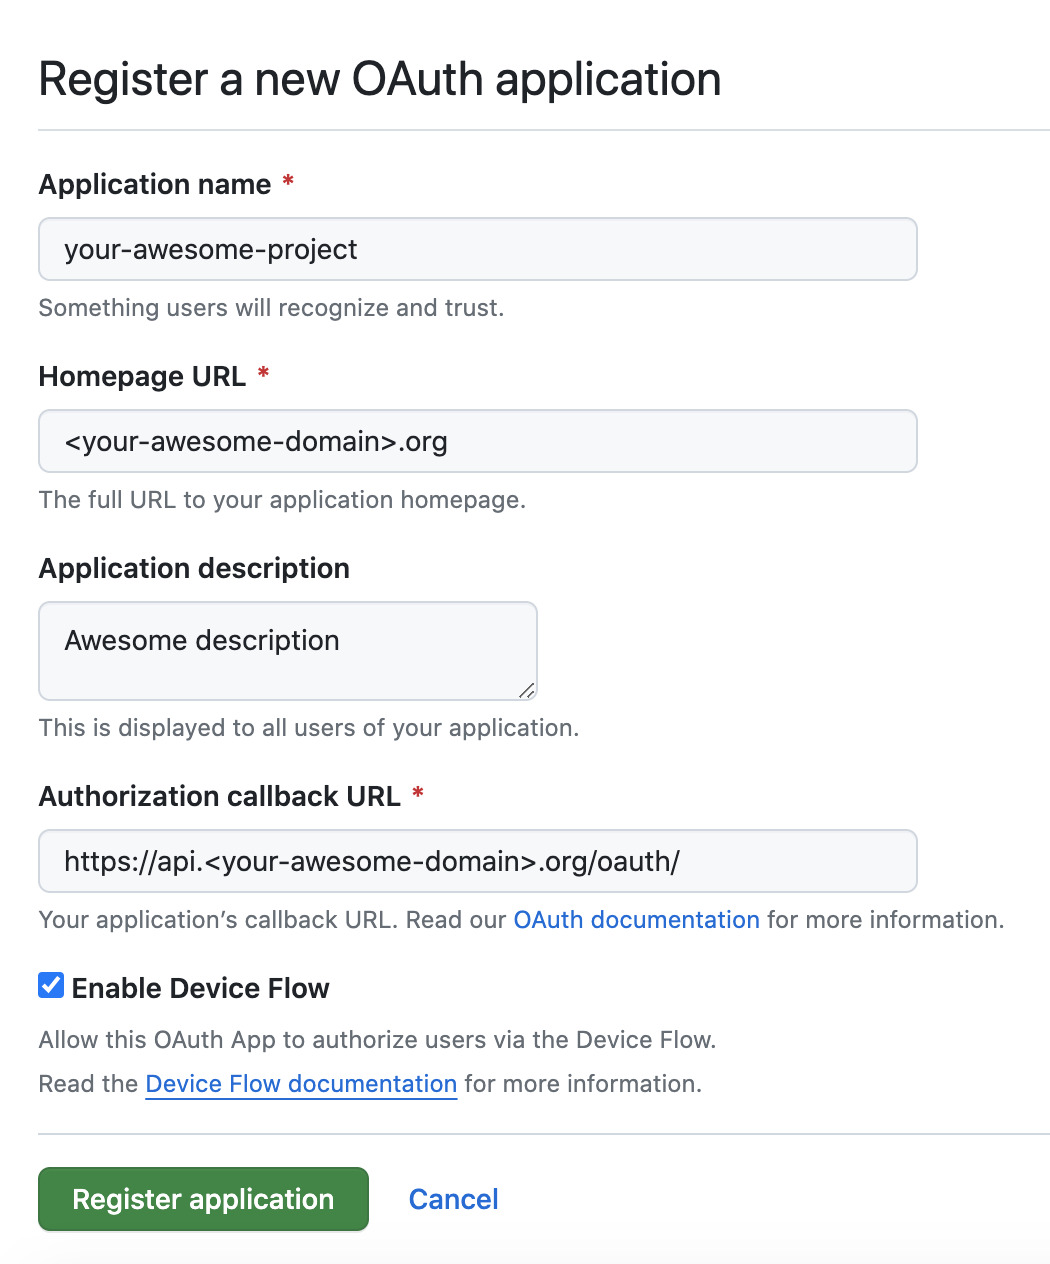
You'll be prompted with the following form -- see the example values populated in this screenshot -- more to come in other sections for where these values might be populated:
Obtaining your OAuth App Credentials
After creating your OAuth App, you'll lastly want to obtain a client secret key and your client ID -- make sure to note these values for further steps when creating your API.

Connecting GitHub with Heroku
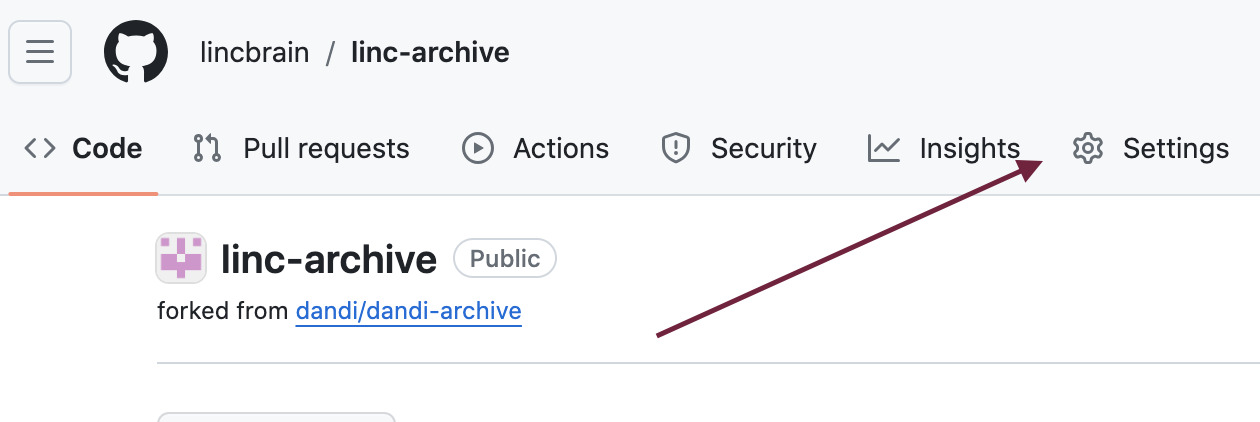
This step is contingent that you have forked dandi-archive
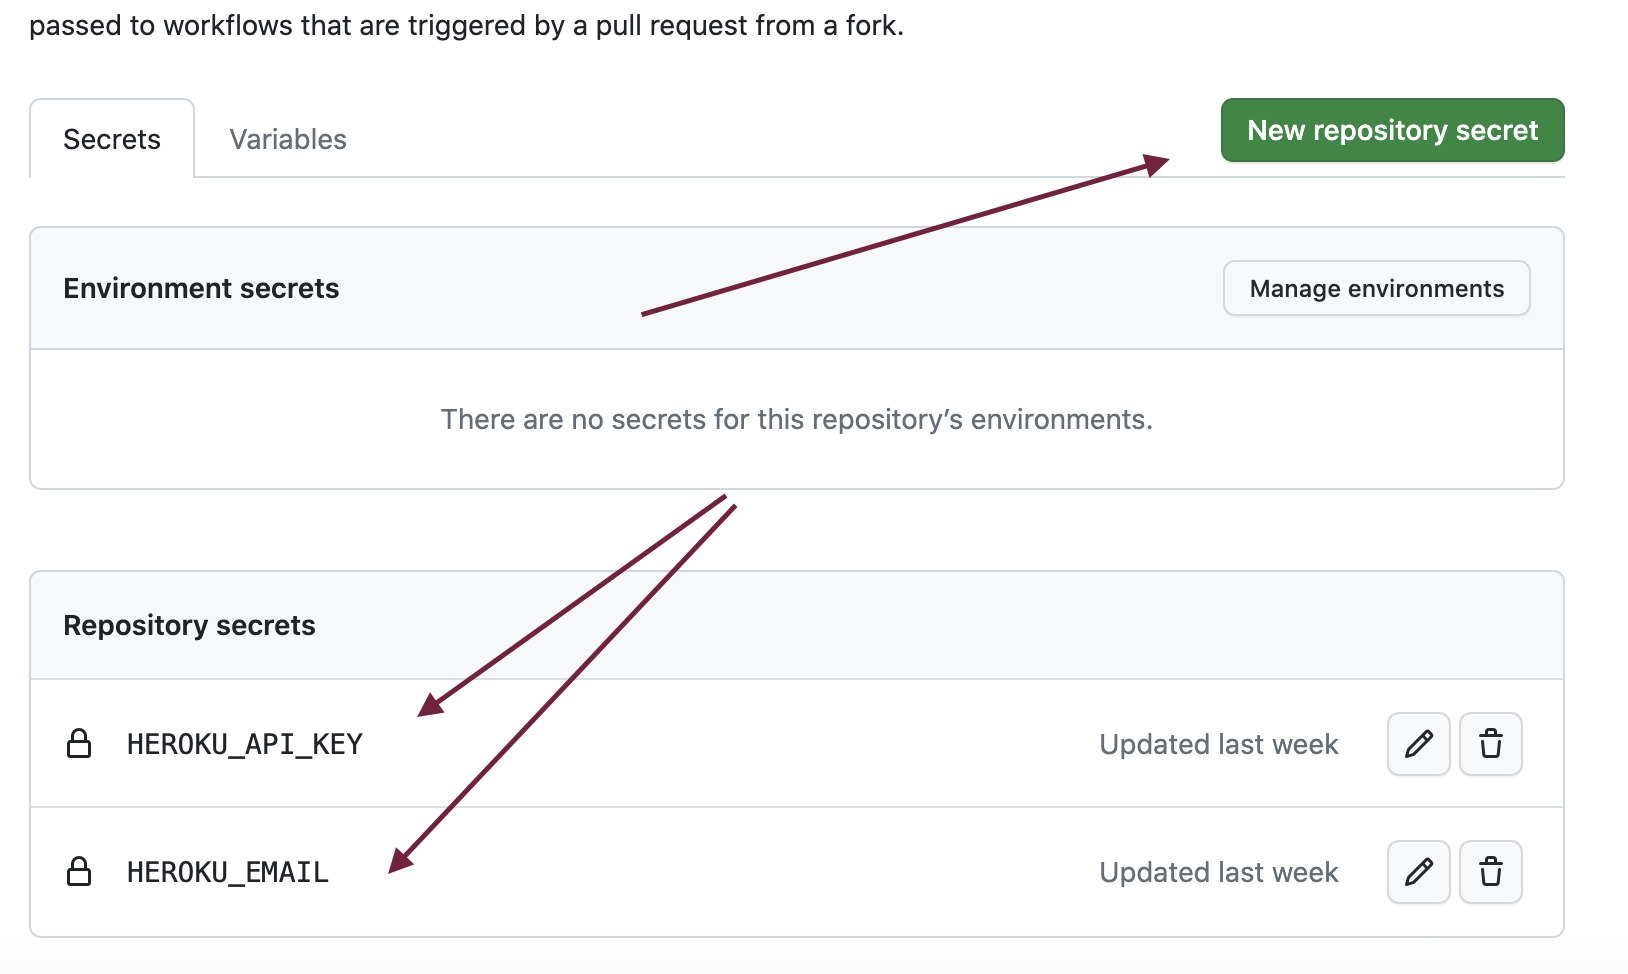
Once you have the repository forked, you'll want to navigate to Settings in the repository page:
Next, navigate to Security > Secrets and variables > Actions
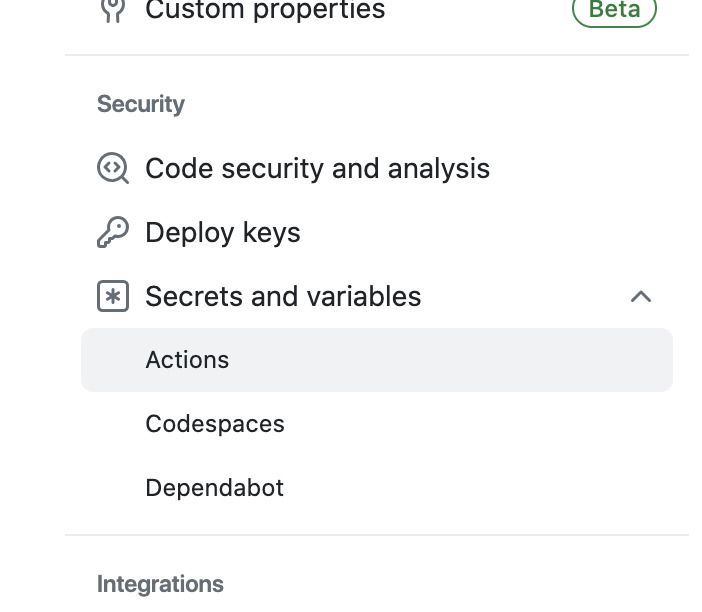
And then lastly create two new secrets, HEROKU_EMAIL should be the email address/account you used to generate your HEROKU_API_KEY
Terraform Cloud
Terraform is configuration tool for managing "infrastructure-as-code" -- meaning that we can programmatically manage infrastructure in a traceable, version-controlled form.
The Terraform ecosystem provides a UI tool called Terraform Cloud.
Start by visiting https://app.terraform.io/ and making an account.
Creating a Terraform Project and Workspace
Once you have successfully made an account, you'll want to create a Workspace and a Project in that Workspace

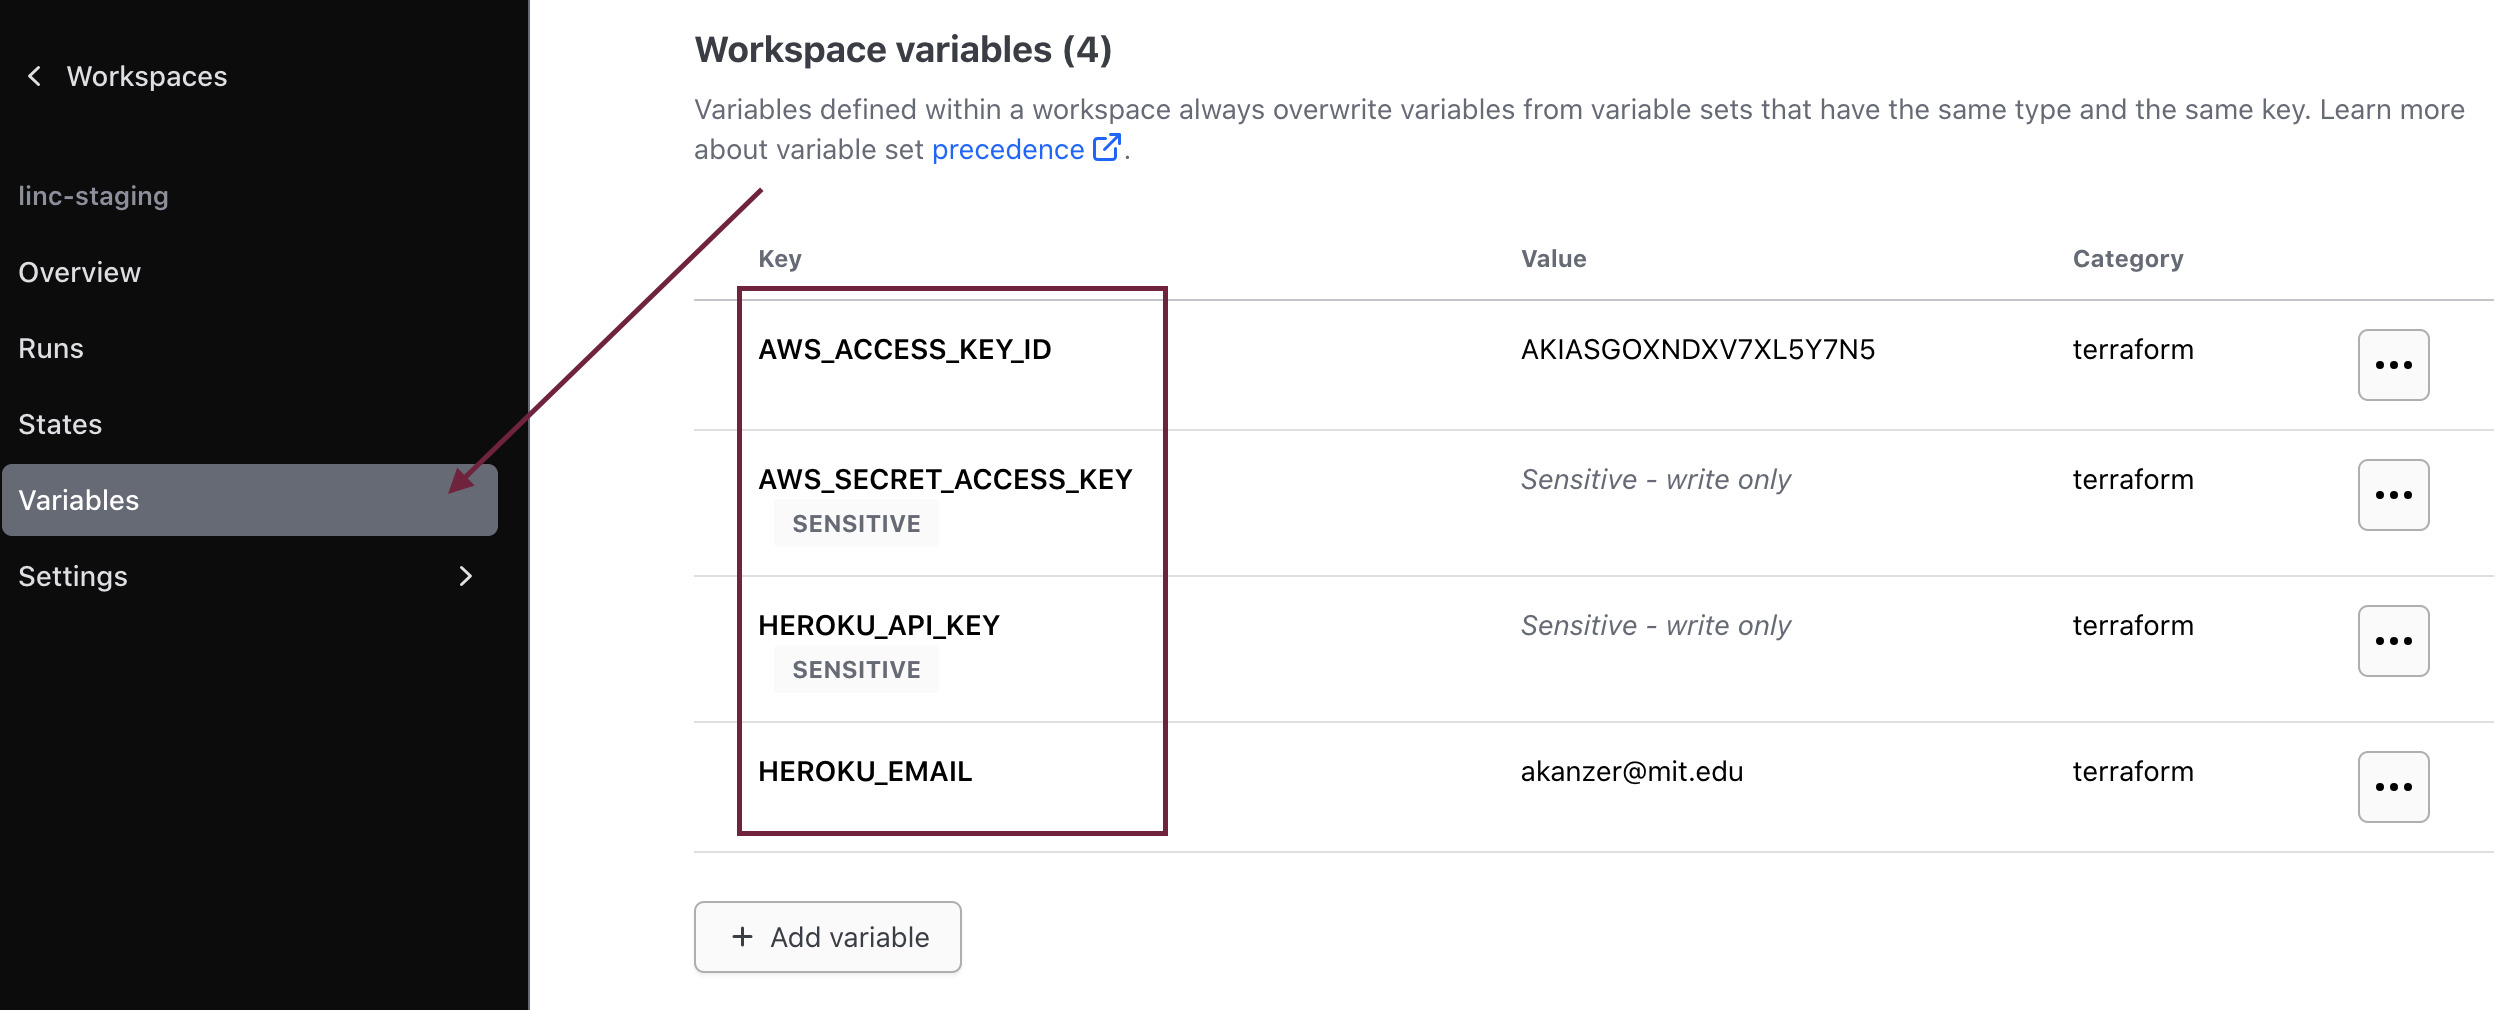
Populate Environment Variables
Populate the following variables in the Variables section of the Workspace:
AWS_ACCESS_KEY_IDAWS_SECRET_ACCESS_KEYHEROKU_API_KEYHEROKU_EMAIL
Link GitHub Repository
Next, link your appropriate GitHub repository, in this case, most likely your fork of dandi-infrastructure.
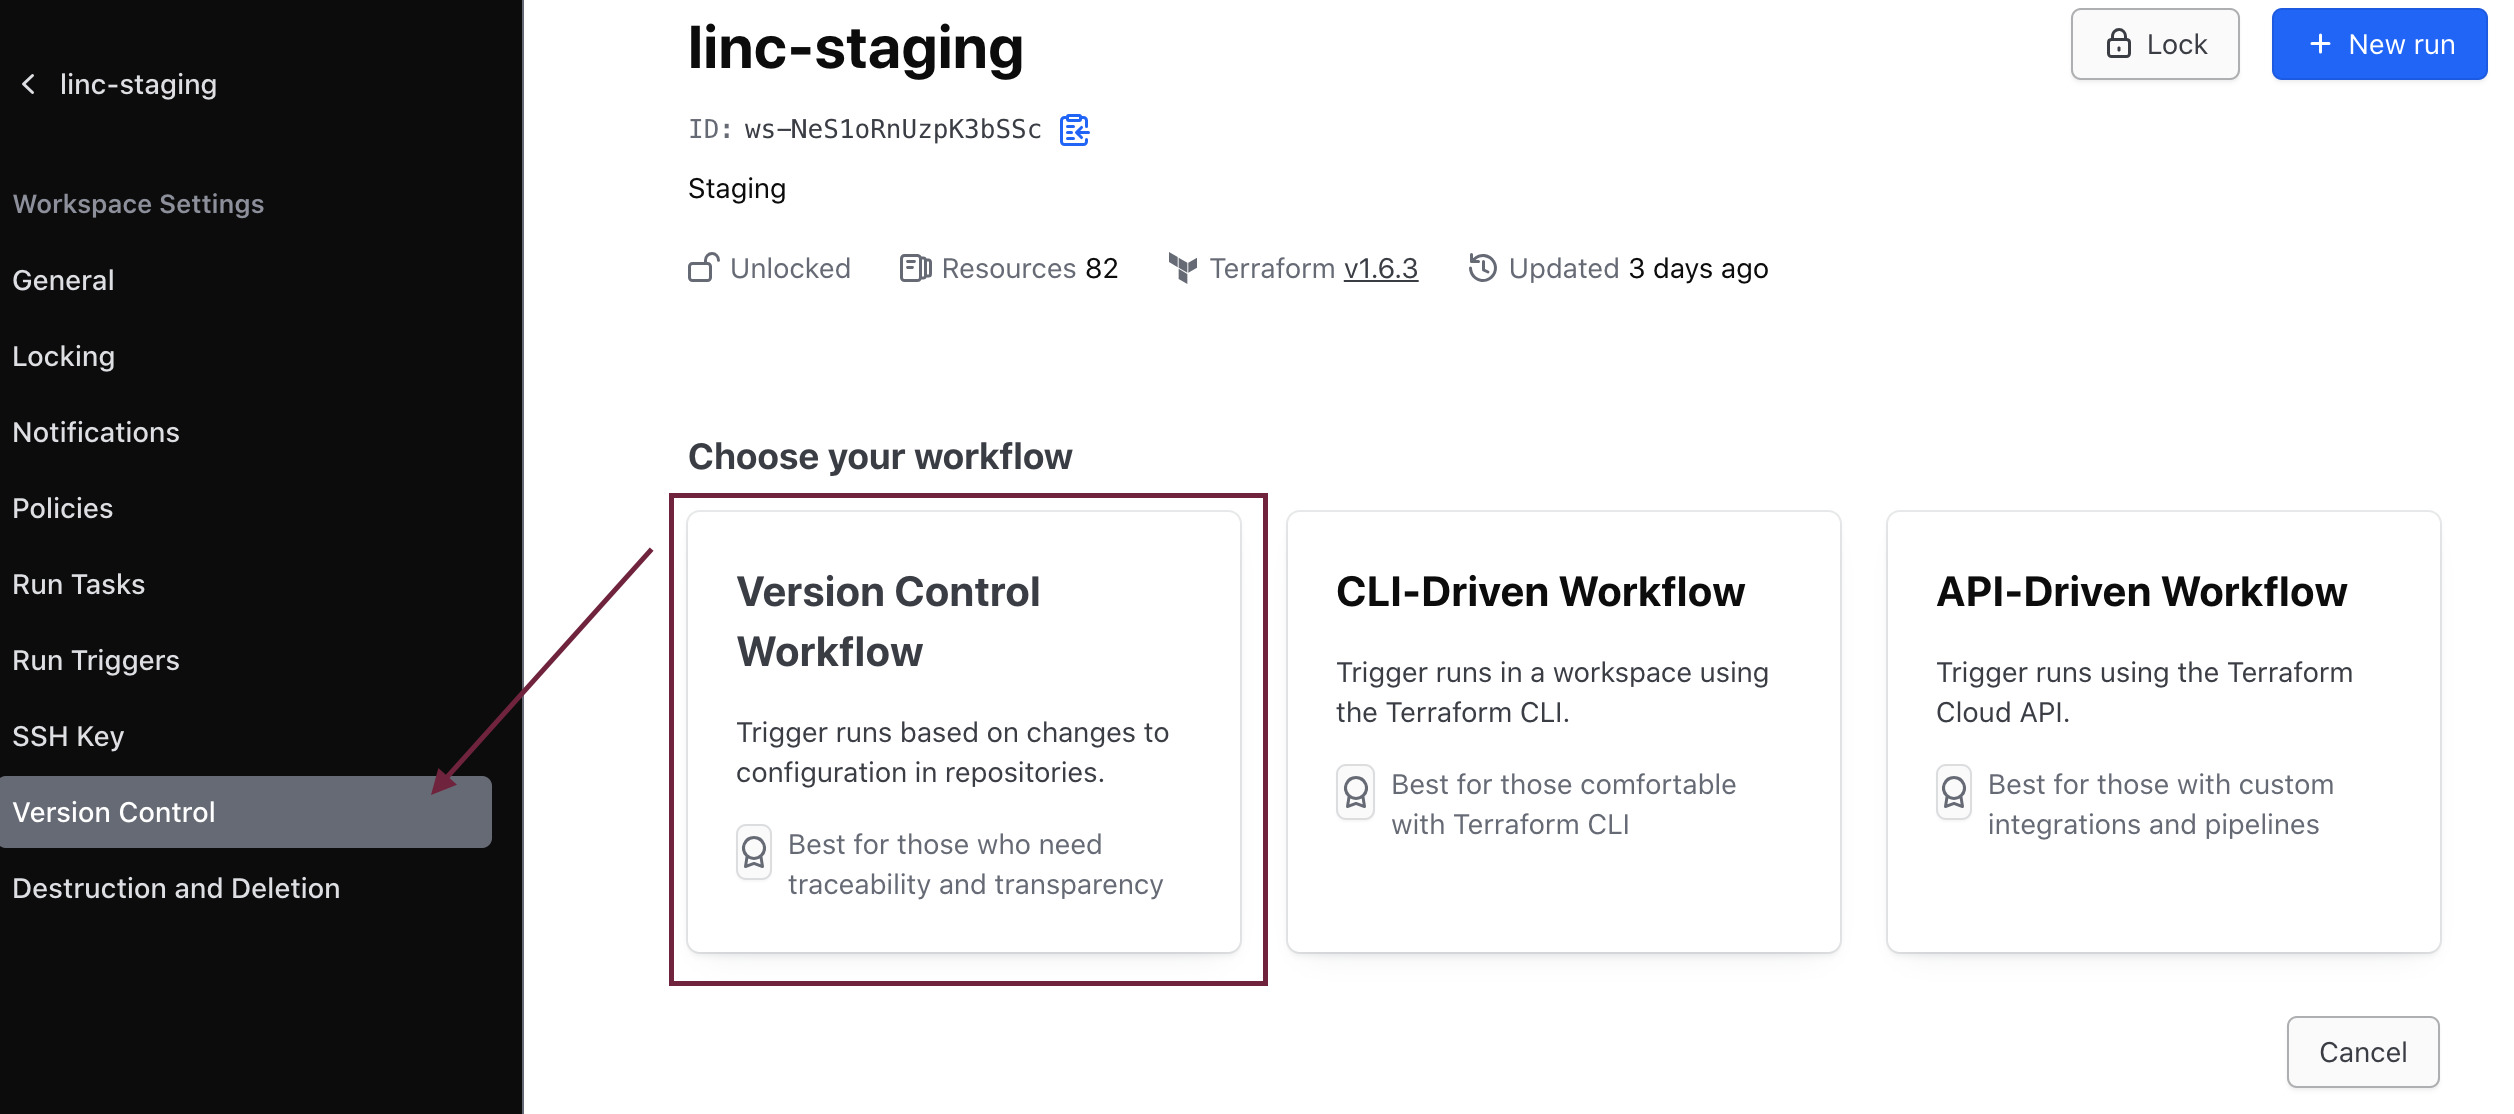
Link your repository -- you may need to declare the appropriate subdirectory
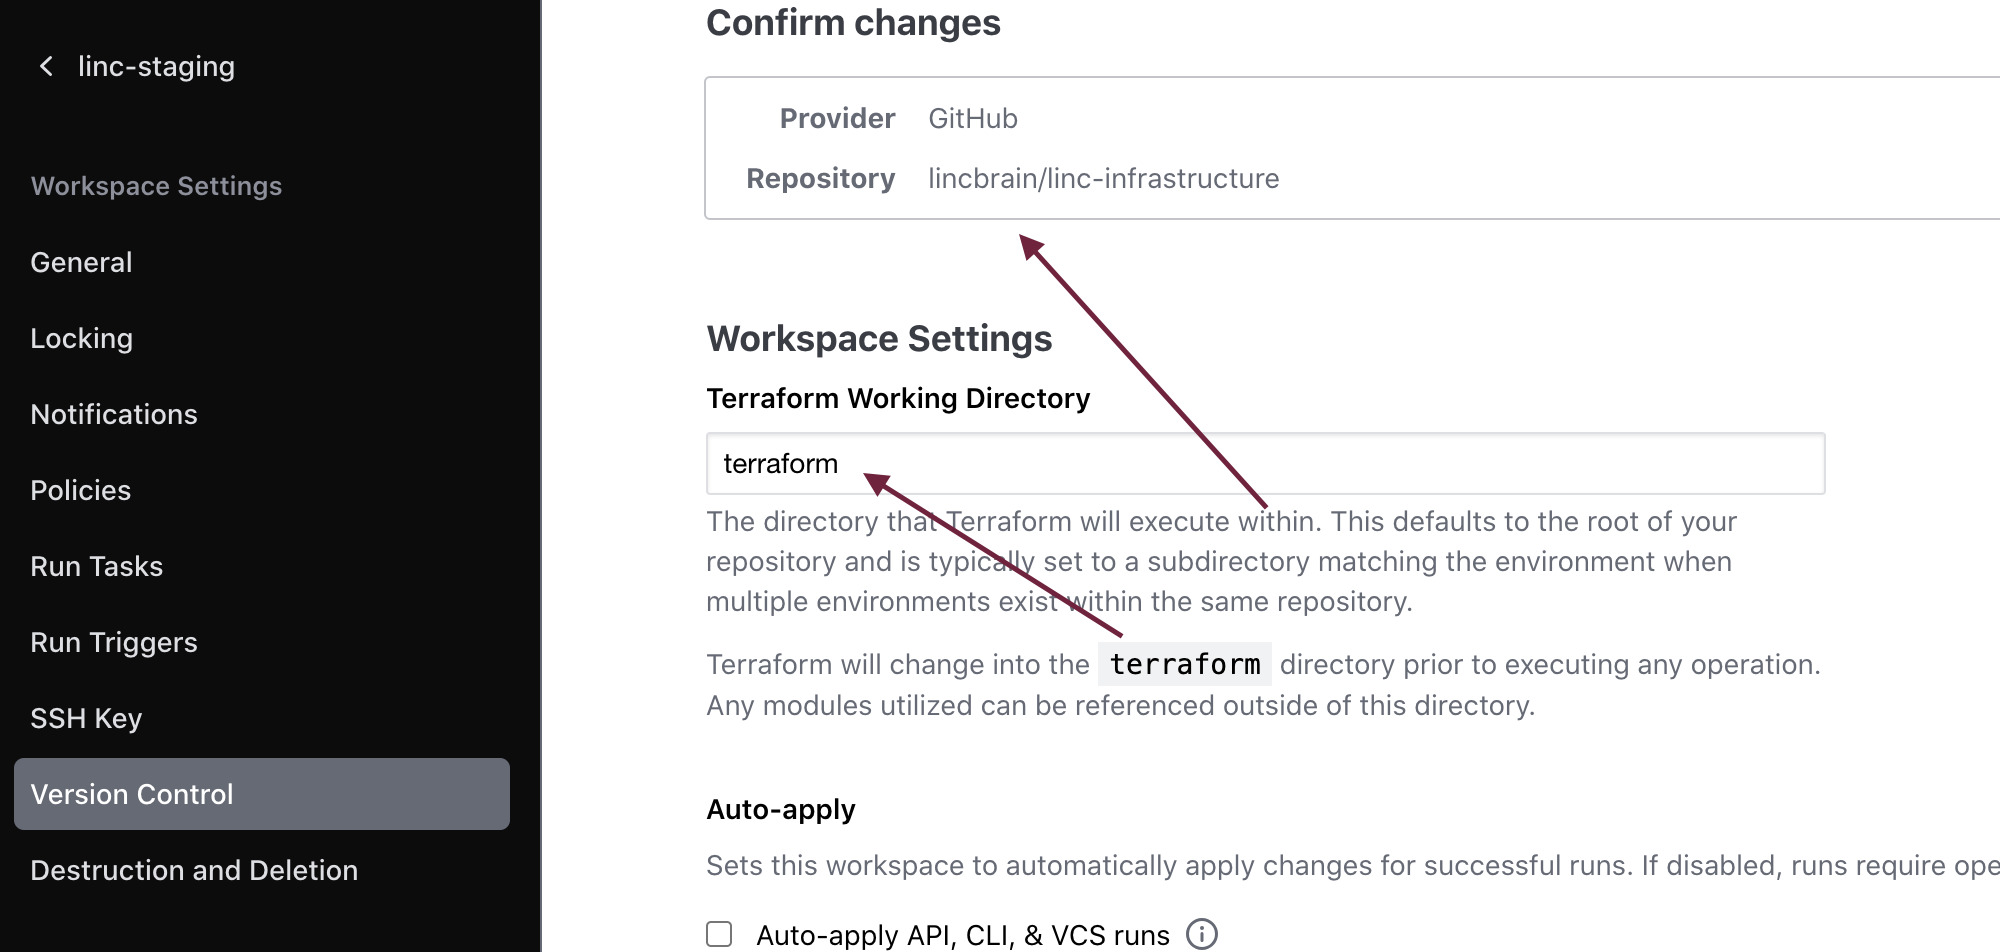
You can now invoke Terraform plan and apply from the Terraform Cloud UI or via your GitHub repository Actions.
Netlify
The frontend for dandi-archive is served via Netlify
Note: A Starter plan should be plenty enough (specifically "build minutes" shouldn't exceed much past ~300 at most a month)
-- if you'd like more control over specific deployments and environments, you
may want to consider Pro -- see here for more details
Create Account and Initialize Project
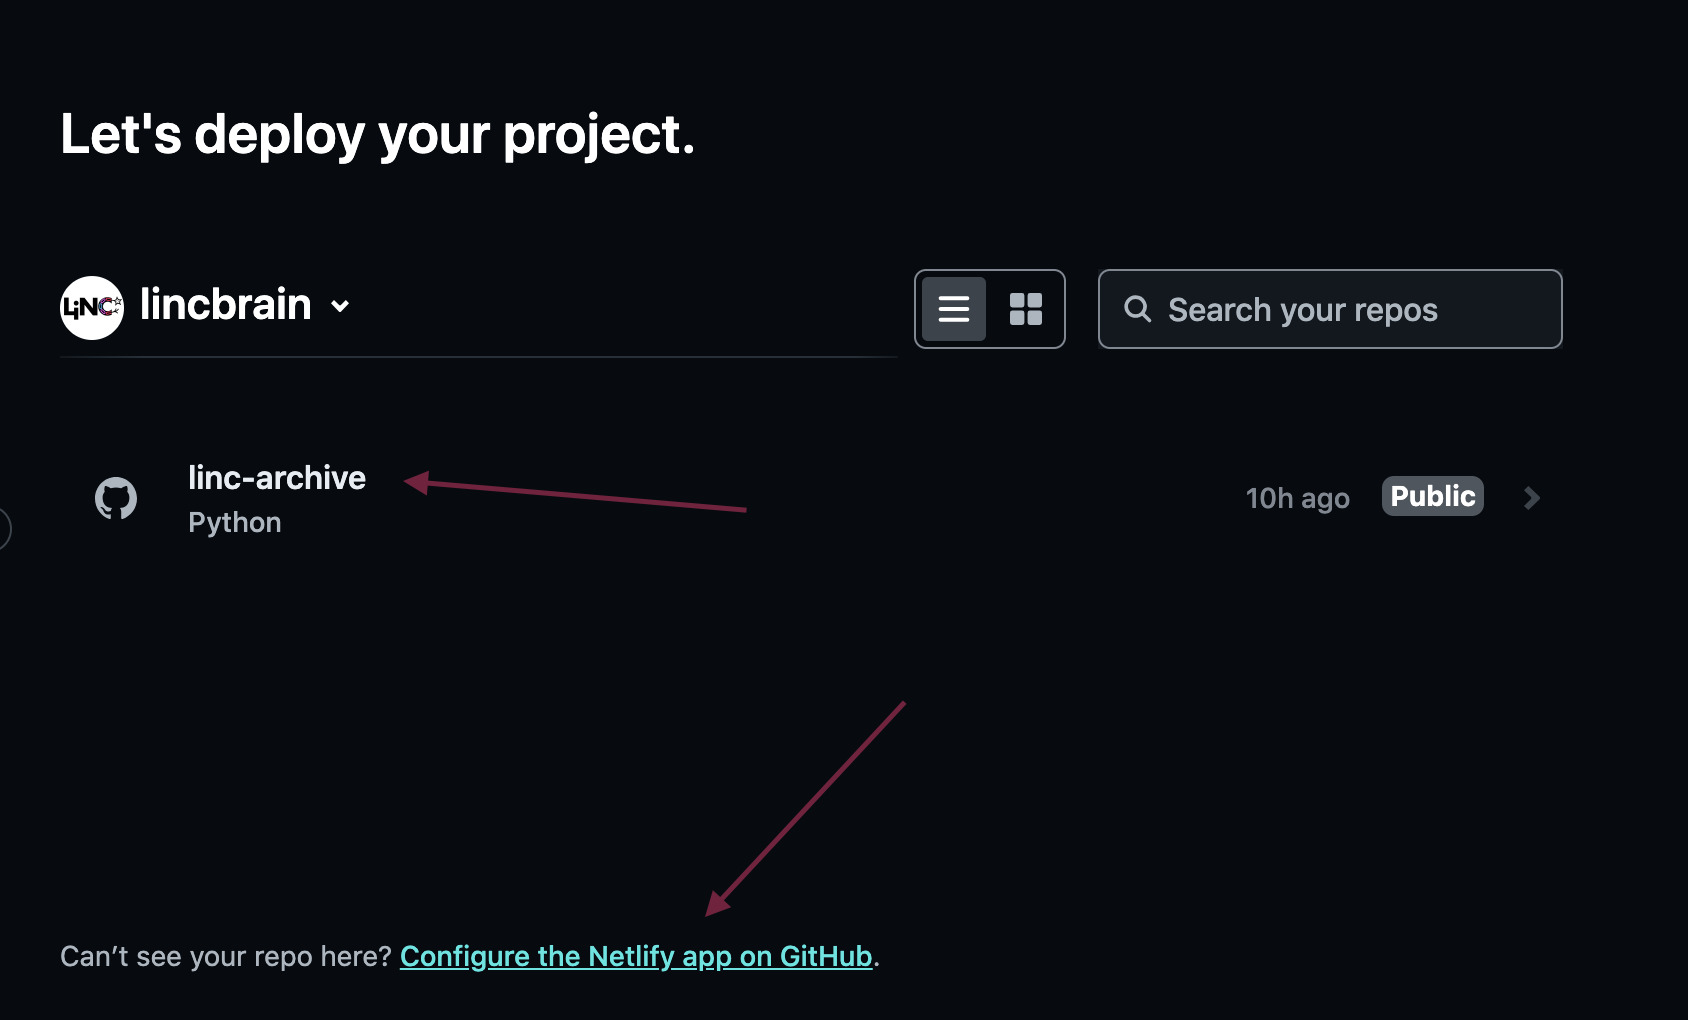
First, create an account. After creating an account, you'll want to navigate to Sites, where you can Add a new site, and then Import an existing project

You'll want to next connect dandi-archive via Deploy with GitHub. Enable Netlify to be authorized as a GitHub app. Once you have
enabled authorization, you'll need to specifically link your appropriate repositories:
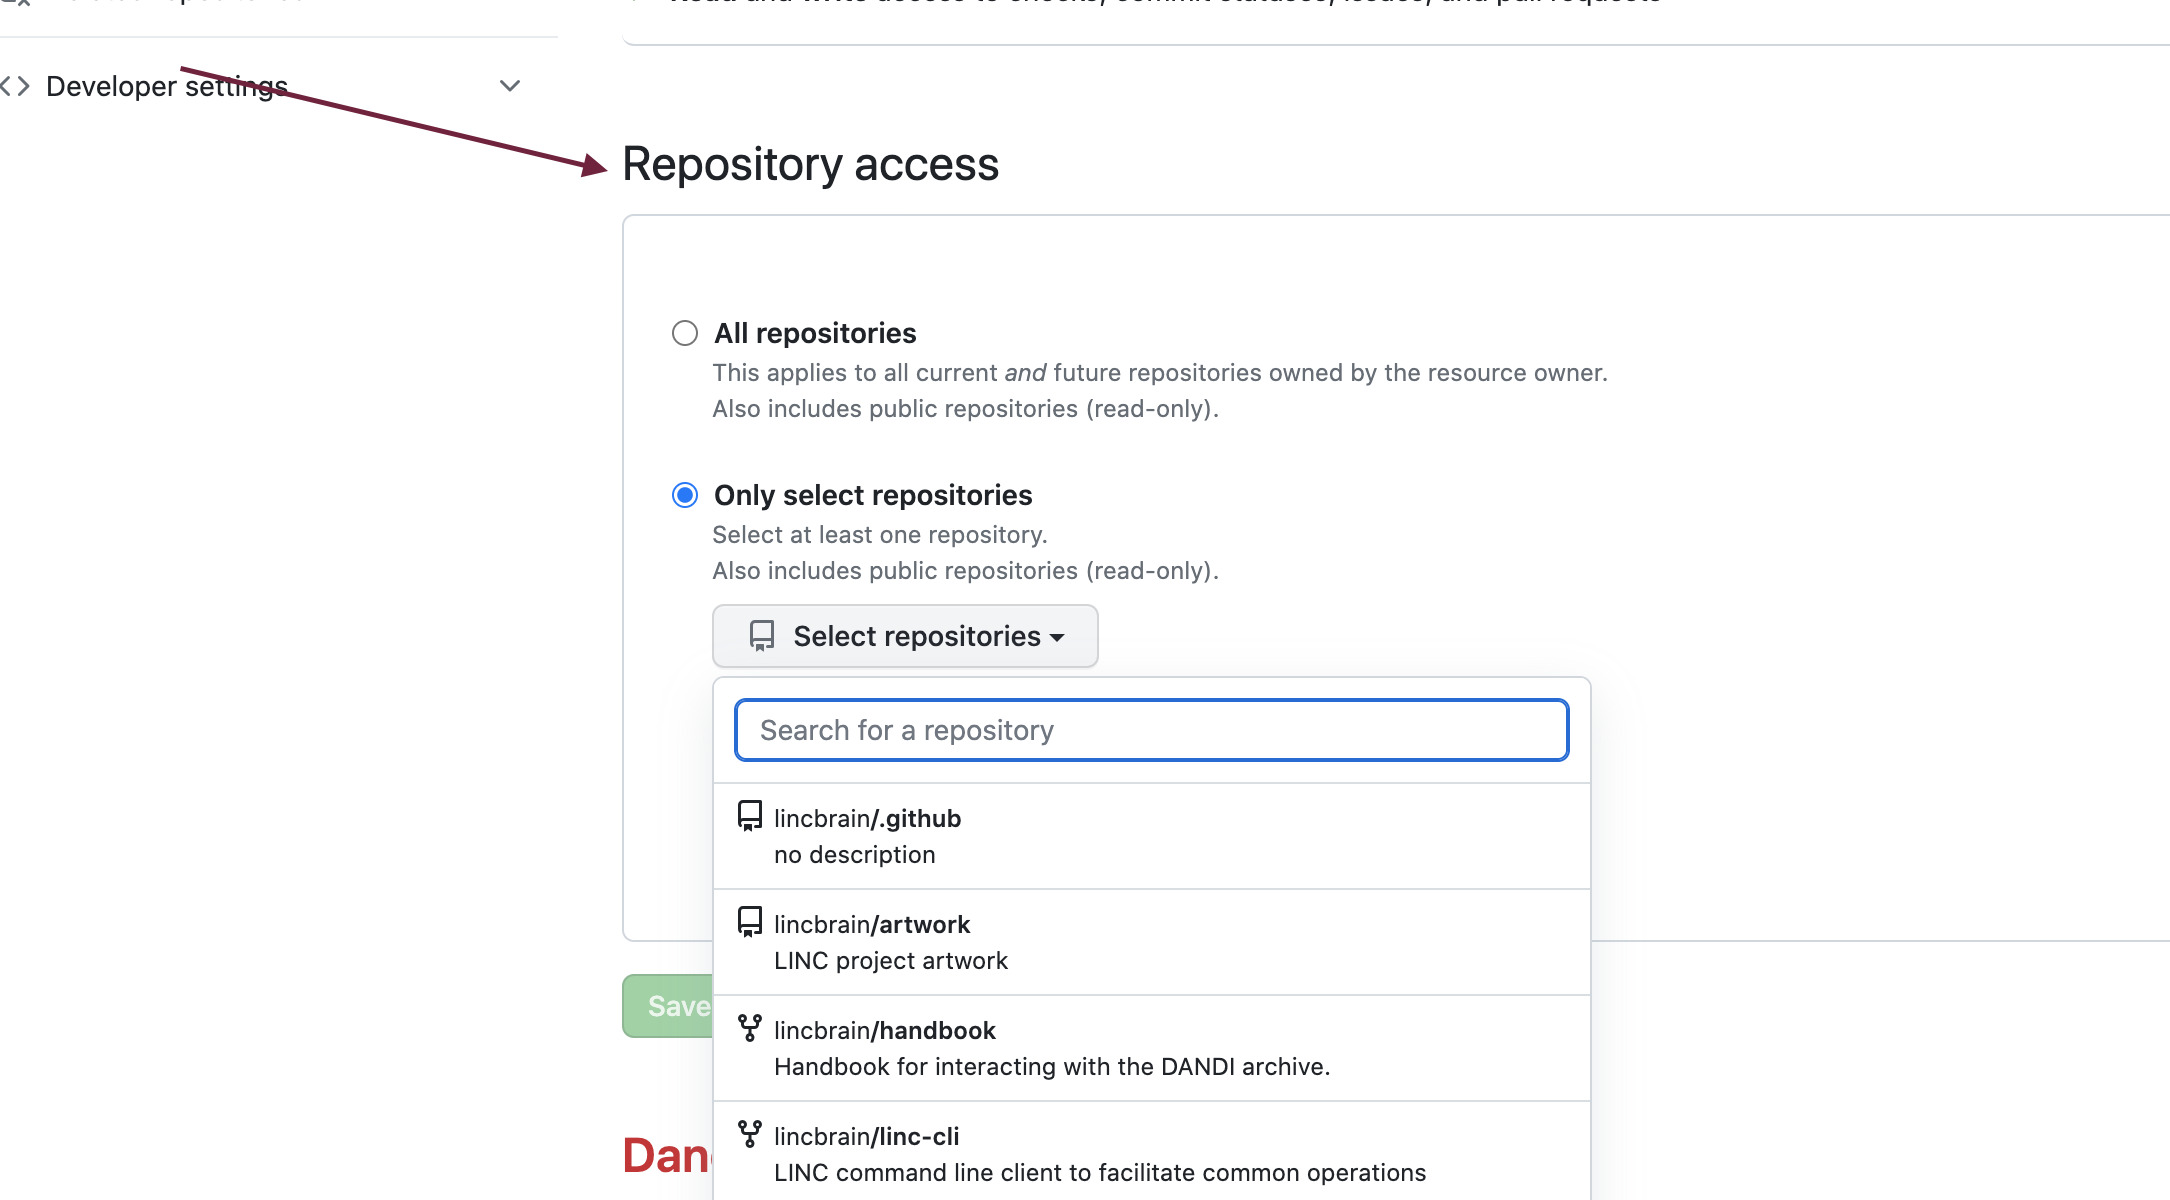
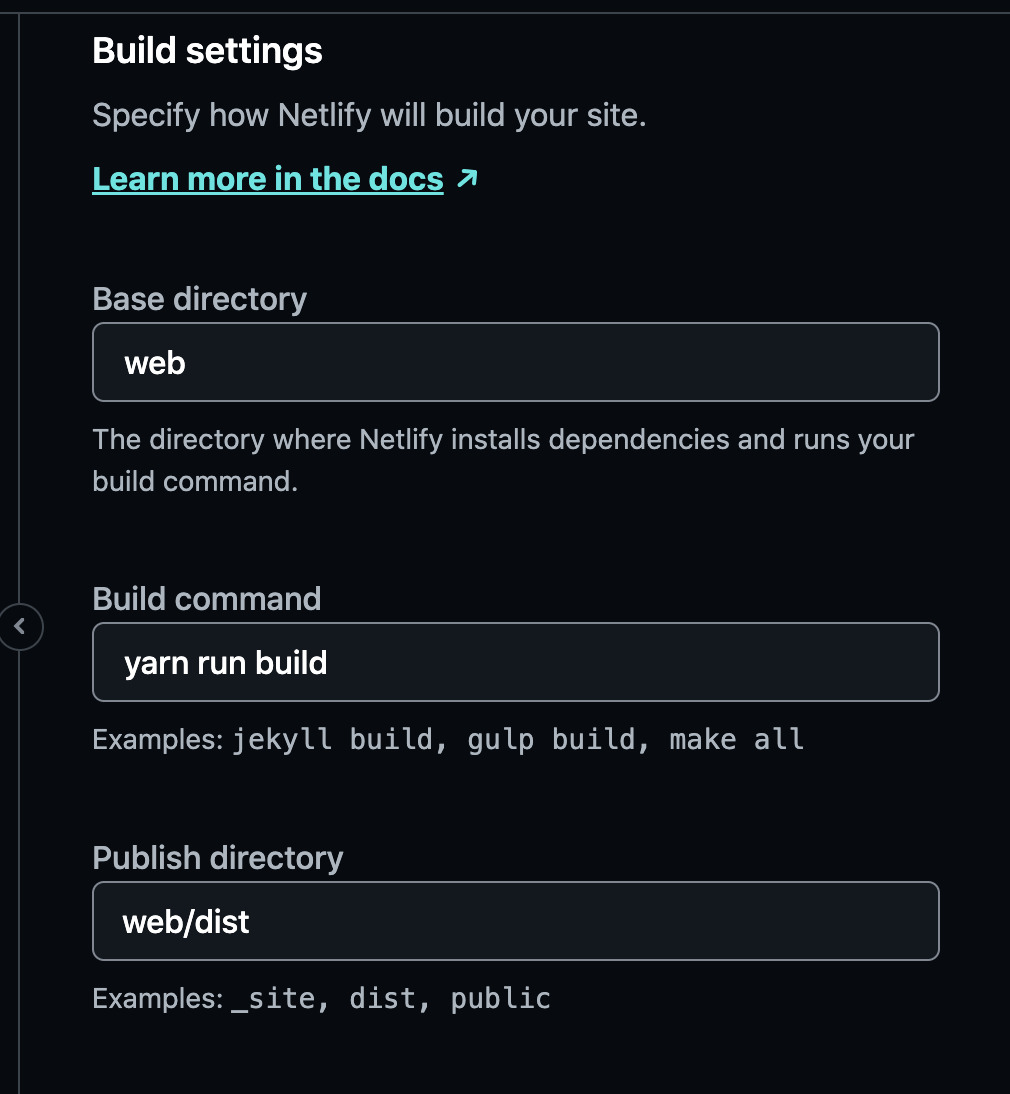
Now once you see the appropriate repository, you'll want to navigate to configure where Netlify can find and build your site
For usage of Netlify, one could refer to declaring a netlify.toml configuration file like the one referenced in DANDI Archive
These values can also be replicated in the settings.
Your frontend should be able to deploy to an auto-generated URL via Netlify now! Steps for domain management and configuration are described further in the Frontend Deployment section within the DANDI Archive setup.
Sentry
Sentry is a monitoring tool used for the DANDI Archive API. It is integral in order to notify engineers if a system is down, experiencing poor performance, or may have unwanted users.
Begin by creating a Sentry account -- once successful, you'll start by creating a new Project:

For your account, the free Developer account should be sufficient, as defined in Sentry's pricing structure.
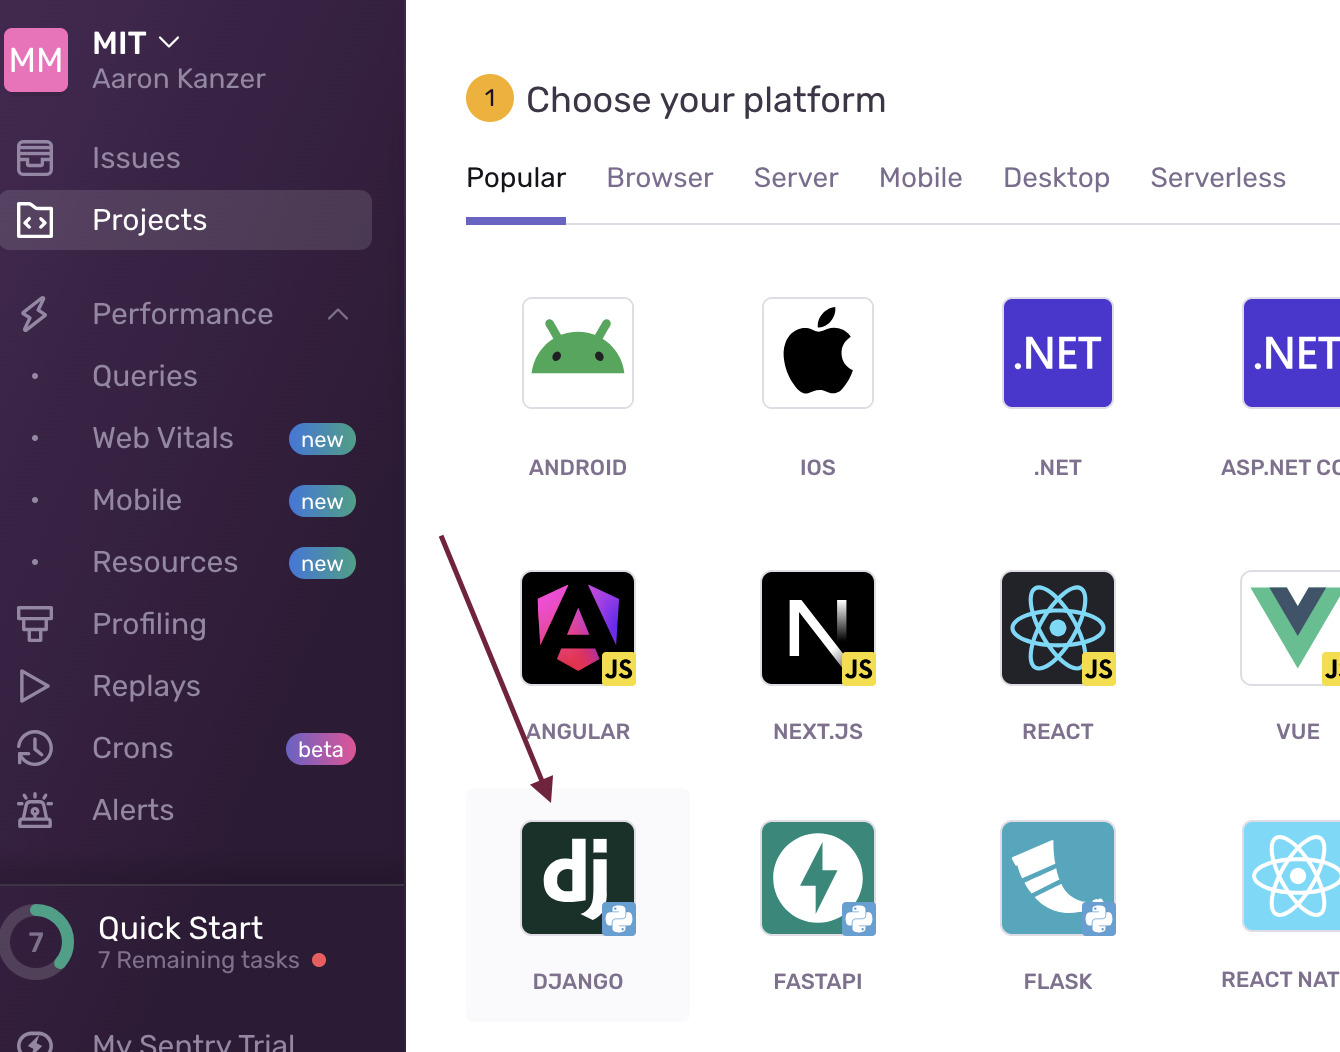
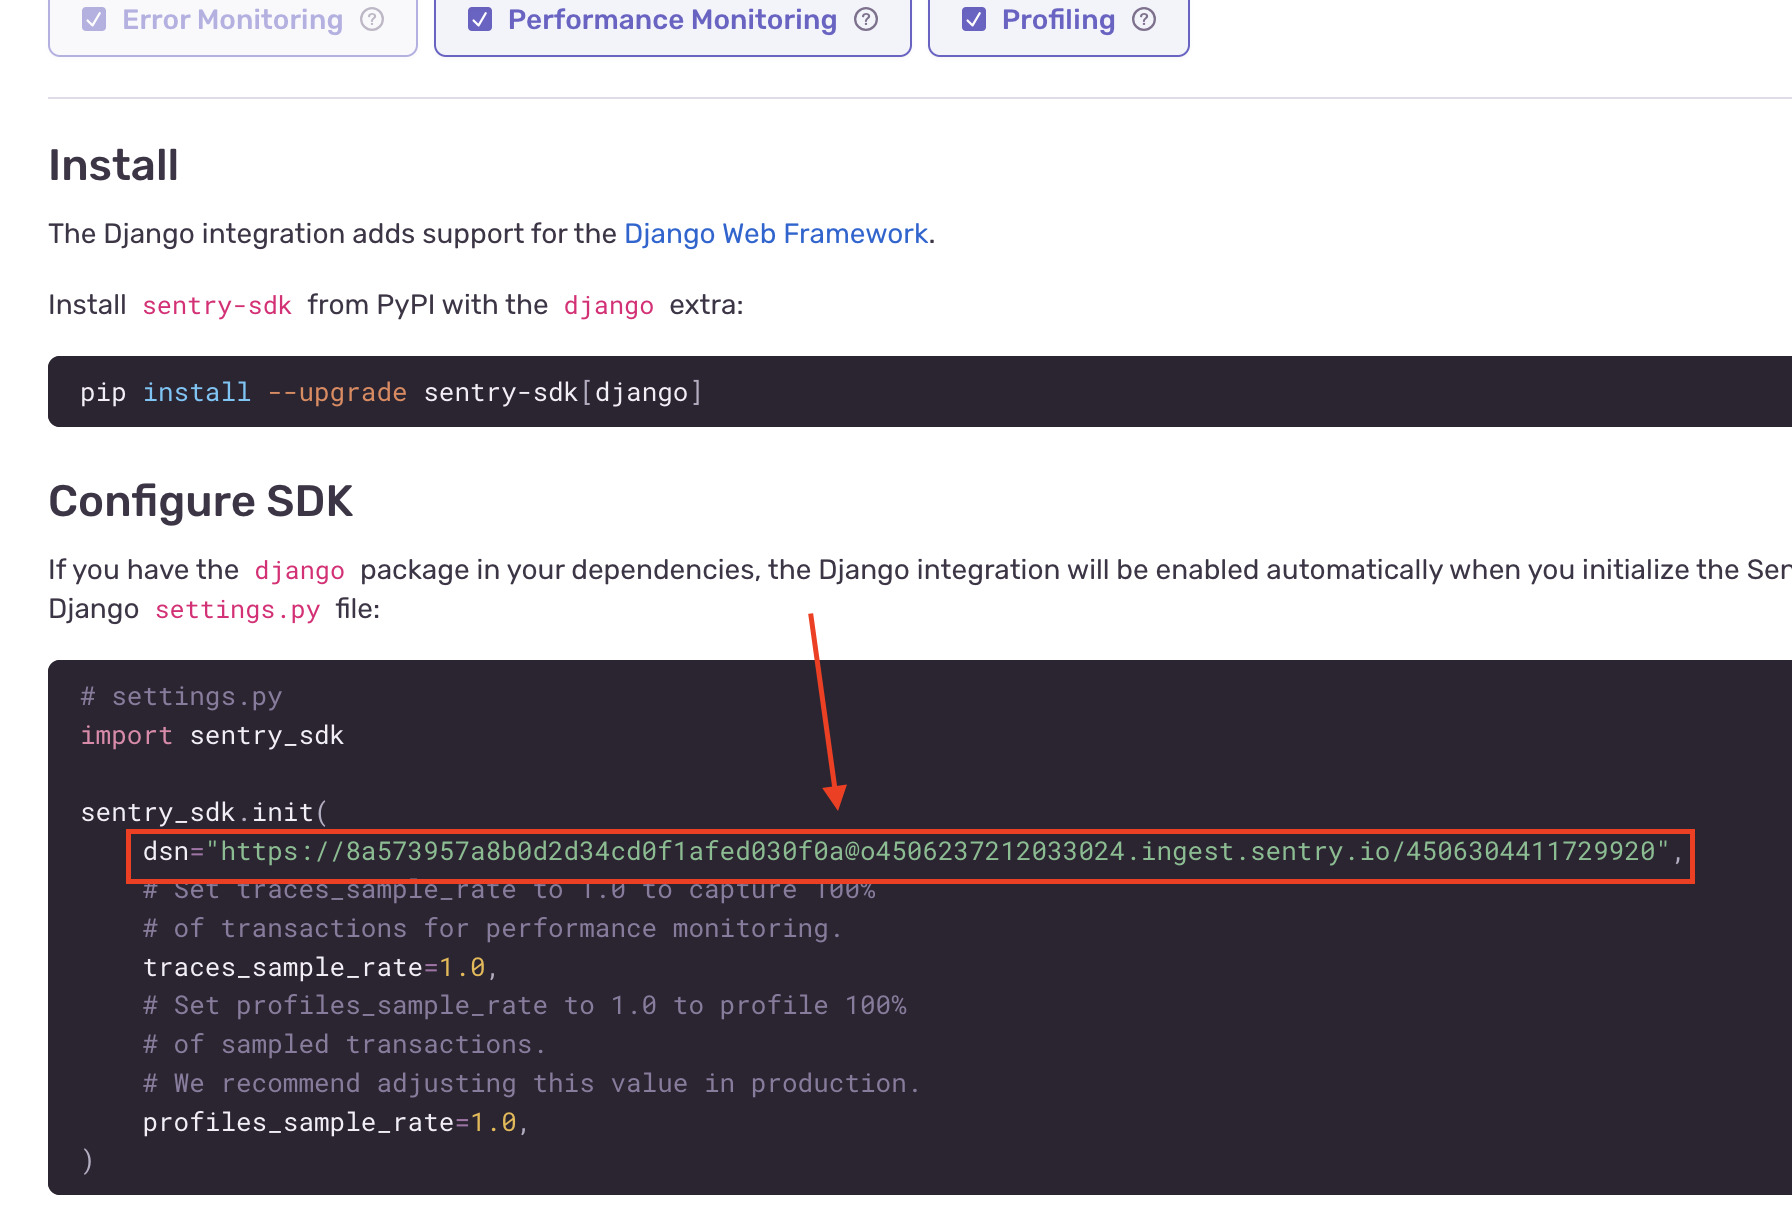
Select Django as an App Type
DANDI Archive API is built as a Django app -- so proceed to select Django on the following screen:
Capture Sentry DSN value
You'll be provided with a screen displaying how to initialize and install Sentry into your Django app. For now, just capture the DSN value. This value will be used later as an environment variable while deploying your API via Terraform.
datalad
We will add docs in the future (https://github.com/dandi/dandi-docs/issues/132).
git-annex
We will add docs in the future (https://github.com/dandi/dandi-docs/issues/132).